M5P Surveying Tips for Wildlife in Remote Areas
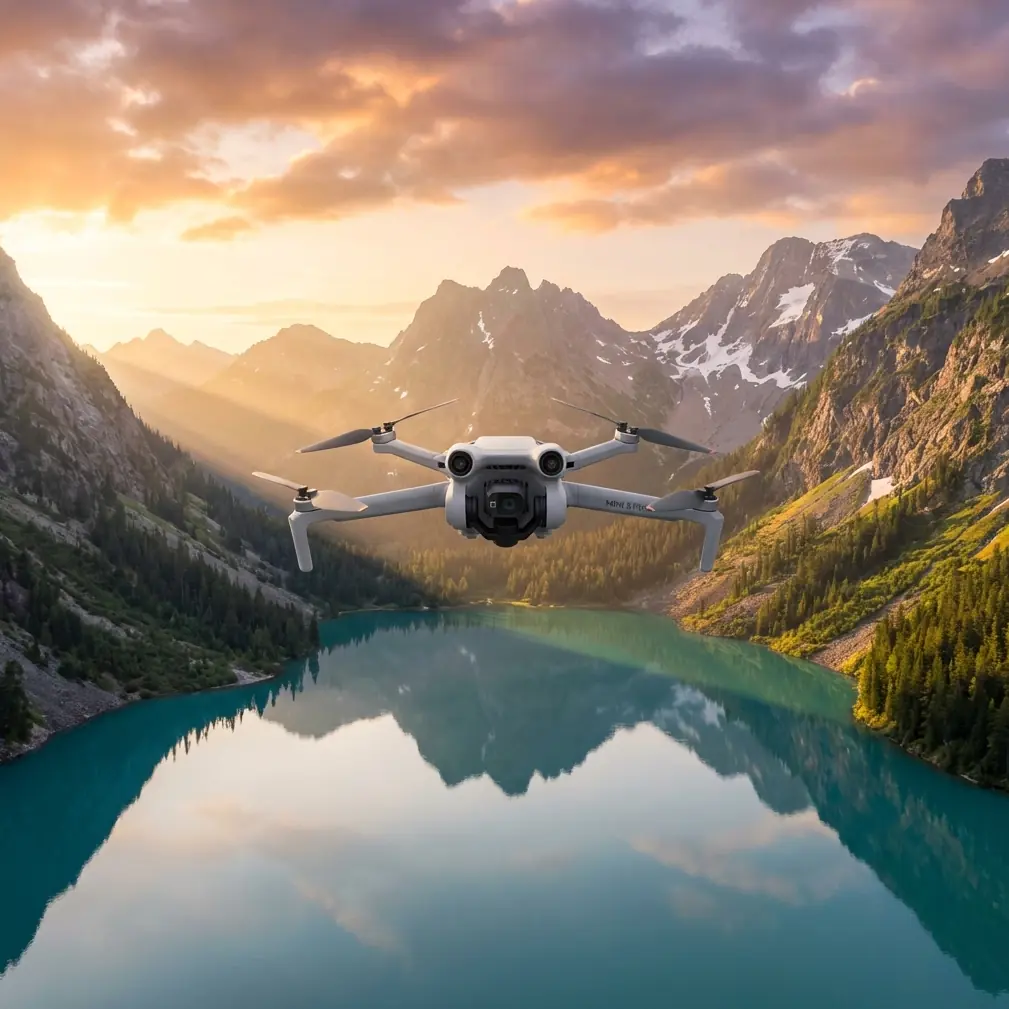
M5P Surveying Tips for Wildlife in Remote Areas
META: Learn essential Mini 5 Pro surveying tips for wildlife monitoring in remote locations. Master obstacle avoidance, ActiveTrack, and D-Log for stunning results.
TL;DR
- Pre-flight sensor cleaning is the single most overlooked step that causes obstacle avoidance failures in dusty, remote wildlife environments
- The Mini 5 Pro's ActiveTrack and Subject tracking capabilities let you follow animals without manual stick input, reducing disturbance
- Shooting in D-Log color profile preserves critical detail in high-contrast jungle canopies and open savanna
- QuickShots and Hyperlapse modes can automate complex cinematic movements while you focus on animal behavior observation
Why Pre-Flight Cleaning Determines Mission Success
Obstacle avoidance sensors caked in dust don't avoid obstacles. That one sentence should change your entire pre-flight routine when flying the Mini 5 Pro in remote wildlife environments. Before every single flight, Chris Park wipes down all six directional sensing surfaces with a microfiber cloth and compressed air—and this tutorial explains why that habit, along with a dozen other field-tested techniques, separates professional wildlife survey footage from amateur flyovers.
Remote wildlife surveying punishes laziness. You're far from replacement parts, operating in environments full of particulate matter—pollen, sand, dried mud, moisture condensation—and your Mini 5 Pro's obstacle avoidance system relies on clean, unobstructed vision sensors to function. A smudged downward-facing sensor won't detect a tree snag during a low-altitude tracking pass. A dust-coated forward sensor may not register a cliff face until it's too late.
Here's the cleaning protocol that should become muscle memory:
- Compressed air first: Blow debris off all sensor windows, the camera lens, gimbal housing, and propeller mounts
- Microfiber wipe second: Gently clean each sensor surface using circular motions—never apply pressure
- Lens pen third: Use the carbon tip on the main camera lens for fingerprints or moisture haze
- Visual inspection fourth: Look at each propeller for nicks, cracks, or warping that could cause vibration
- Gimbal calibration fifth: Run a gimbal auto-calibration on flat ground after cleaning to ensure accurate stabilization
Expert Insight: Chris Park carries three separate microfiber cloths in the field—one for sensors, one for the camera lens, and one spare sealed in a zip-lock bag. Cross-contamination from a cloth used on dusty sensors can scratch optical coatings on the main camera lens. This costs nothing and saves thousands.
Setting Up the Mini 5 Pro for Wildlife Subject Tracking
ActiveTrack is your most powerful tool for wildlife surveying, but it requires deliberate configuration to work reliably on animals. Out of the box, the system is optimized for people and vehicles. Animals present unique challenges—irregular silhouettes, camouflaged coloring, and unpredictable movement patterns.
Step 1: Select Your Tracking Mode
The Mini 5 Pro offers three ActiveTrack behavior modes:
- Trace: The drone follows behind or in front of the subject. Best for animals moving along predictable paths—game trails, riverbanks, migration corridors
- Parallel: The drone flies alongside the subject at a fixed distance. Ideal for herds or packs moving across open terrain
- Spotlight: The drone stays stationary while the gimbal tracks the subject. Use this when animals are feeding or resting and you want to minimize rotor noise disturbance
Step 2: Draw a Precise Selection Box
This is where most operators fail. When you draw the subject tracking box on your screen, follow these rules:
- Make the box tight around the animal's body—don't include surrounding vegetation
- For dark-colored animals against dark backgrounds, try to capture a contrasting edge (like the skyline above a silhouette)
- If the animal is partially obscured, wait for a clearer moment before initiating the track
- Re-draw the box if the drone loses lock—don't trust auto-reacquisition in camouflaged environments
Step 3: Set Appropriate Following Distance
Wildlife surveying demands maintaining a minimum altitude of 30 meters for most medium-to-large mammals to avoid behavioral disturbance. For birds and sensitive species, 50 meters or more is standard practice. Configure your following distance in the tracking settings before launch, not during flight.
Configuring D-Log for Maximum Post-Production Flexibility
Remote wildlife environments present extreme dynamic range challenges. A bright sky above a dense canopy creates up to 14 stops of contrast variation in a single frame. D-Log is the Mini 5 Pro's flat color profile that preserves highlight and shadow detail for color grading in post-production.
When to Use D-Log vs. Normal Color
| Scenario | Recommended Profile | Reason |
|---|---|---|
| Open savanna, midday sun | D-Log | Preserves blown-out sky and deep shadow detail simultaneously |
| Overcast forest canopy | Normal or D-Log | Lower contrast means Normal can work; D-Log still preferred |
| Golden hour tracking shots | D-Log | Warm directional light creates harsh shadows on terrain |
| Night/low-light surveys | Normal | D-Log raises noise floor significantly in underexposed footage |
| Quick social media clips | Normal | No time for grading; Normal delivers ready-to-share color |
D-Log Camera Settings for Wildlife
- ISO: Keep at 100 whenever possible. Auto ISO introduces noise in D-Log
- Shutter Speed: Double your frame rate (shooting 4K/30 → use 1/60s)
- ND Filters: Essential. Carry an ND8, ND16, and ND32 set for remote fieldwork
- White Balance: Set manually to 5500K for daylight consistency—never use auto in D-Log, as shifting white balance destroys color grading consistency across clips
Pro Tip: Shoot 10 seconds of a gray card or neutral reference at the start of each D-Log session. When you're processing hundreds of clips from a week-long remote survey, this reference frame lets you batch-correct white balance across your entire timeline in seconds.
Using QuickShots and Hyperlapse for Automated Survey Patterns
Manual stick flying demands your full attention. QuickShots and Hyperlapse free your cognitive bandwidth so you can observe animal behavior, take field notes, or monitor multiple survey zones simultaneously.
Best QuickShots Modes for Wildlife
- Circle: Orbits a fixed point. Excellent for nesting sites, watering holes, or animal dens. Set the radius to 20-40 meters for a wide contextual establishing shot
- Helix: Ascending spiral. Reveals landscape context around a wildlife congregation point
- Dronie: Pulls away from subject while ascending. Creates a dramatic reveal of habitat scale
- Rocket: Straight vertical ascent. Perfect for showing herd density from above without horizontal movement that might spook animals
Hyperlapse for Environmental Context
Wildlife surveys aren't just about animals. Documenting habitat change over time is equally critical. Hyperlapse mode lets you create compressed-time sequences showing:
- Water level changes at seasonal pools
- Cloud and weather pattern movement across survey areas
- Vegetation density shifts between survey visits
- Human encroachment or land-use changes at habitat boundaries
Set Hyperlapse to Free mode with a 2-second interval for most environmental documentation. This produces smooth results without requiring a predefined flight path.
Technical Comparison: Mini 5 Pro Wildlife Survey Capabilities
| Feature | Mini 5 Pro Capability | Wildlife Survey Benefit |
|---|---|---|
| Weight | Under 249g | Exempt from registration in many jurisdictions; less noise disturbance |
| Obstacle Avoidance | Tri-directional / omnidirectional sensing | Critical for flying near tree canopies and terrain obstacles |
| Max Flight Time | Up to 31+ minutes | Extended survey transects without battery swaps |
| ActiveTrack | Subject tracking with Trace/Parallel/Spotlight | Hands-free animal following with consistent framing |
| Video Resolution | Up to 4K/60fps | High detail for species identification in post-review |
| D-Log | 10-bit flat color profile | Maximum dynamic range in challenging lighting |
| Transmission Range | Up to 12+ km | Reliable control across large survey areas |
| Wind Resistance | Level 5 (29-38 km/h) | Stable footage in exposed, windy field conditions |
Common Mistakes to Avoid
Flying too low over sensitive species. The Mini 5 Pro is quiet, but not silent. Raptors, waterfowl, and ungulates with young will react to overhead drone presence at altitudes below 30 meters. This contaminates behavioral data and risks animal welfare.
Ignoring sensor contamination between flights. Dust accumulates fast. One operator in a Kenyan survey lost a Mini 5 Pro to a tree collision because forward obstacle avoidance failed after mud splash dried on the sensors during a brief landing.
Shooting everything in D-Log without ND filters. D-Log requires precise exposure control. Without ND filters, you'll be forced to use fast shutter speeds that create jittery, unnatural motion in wildlife footage—defeating the purpose of the flat profile entirely.
Draining batteries to zero in remote locations. Always land with at least 20% battery remaining. Remote environments mean wind conditions change without warning, return-to-home distances may be significant, and a dead battery in the field means a lost drone with no recovery option.
Neglecting to format SD cards before each survey day. Corrupted files from fragmented storage have ruined more survey datasets than any hardware failure. Format in-camera—never on a computer—at the start of each session.
Frequently Asked Questions
Can the Mini 5 Pro's ActiveTrack reliably follow animals through vegetation?
ActiveTrack performs well in open and semi-open environments but can lose lock when animals move behind dense vegetation. The system works best when there's a clear contrast difference between the animal and its background. For heavily camouflaged species in thick bush, plan your tracking passes along clearings, game trails, or water edges where the animal's silhouette is most distinct. If the lock drops, the drone will hold its last known position—it won't crash, but you'll need to manually reacquire the subject.
What's the ideal flight altitude for wildlife surveying with the Mini 5 Pro?
This depends entirely on species sensitivity and survey objectives. For behavioral observation, fly at 30-50 meters to capture detailed footage without causing disturbance. For population counts and habitat mapping, altitudes of 60-120 meters provide broader coverage per flight. For nest or den site documentation, brief descents to 15-20 meters may be necessary, but limit these passes to under 60 seconds to minimize stress on the animals. Always check local wildlife authority regulations—some protected species have mandated minimum approach distances that apply to drones.
How many batteries should I bring for a full-day remote wildlife survey?
Plan for a minimum of 6 batteries for a productive full-day survey. With roughly 30 minutes of usable flight time per battery (accounting for wind, temperature, and the 20% reserve rule), six batteries give you approximately 3 hours of actual survey flight time. Bring a portable charging solution—a high-capacity power station rated at 500Wh or higher—so you can rotate batteries throughout the day. Chris Park typically carries 8 batteries and a solar-compatible power station for multi-day remote expeditions where grid power isn't available.
Ready for your own Mini 5 Pro? Contact our team for expert consultation.