Mini 5 Pro Guide: Surveying Wildlife Terrain
Mini 5 Pro Guide: Surveying Wildlife Terrain
META: Learn how the Mini 5 Pro transforms wildlife surveying in complex terrain with obstacle avoidance, subject tracking, and D-Log color science for stunning results.
TL;DR
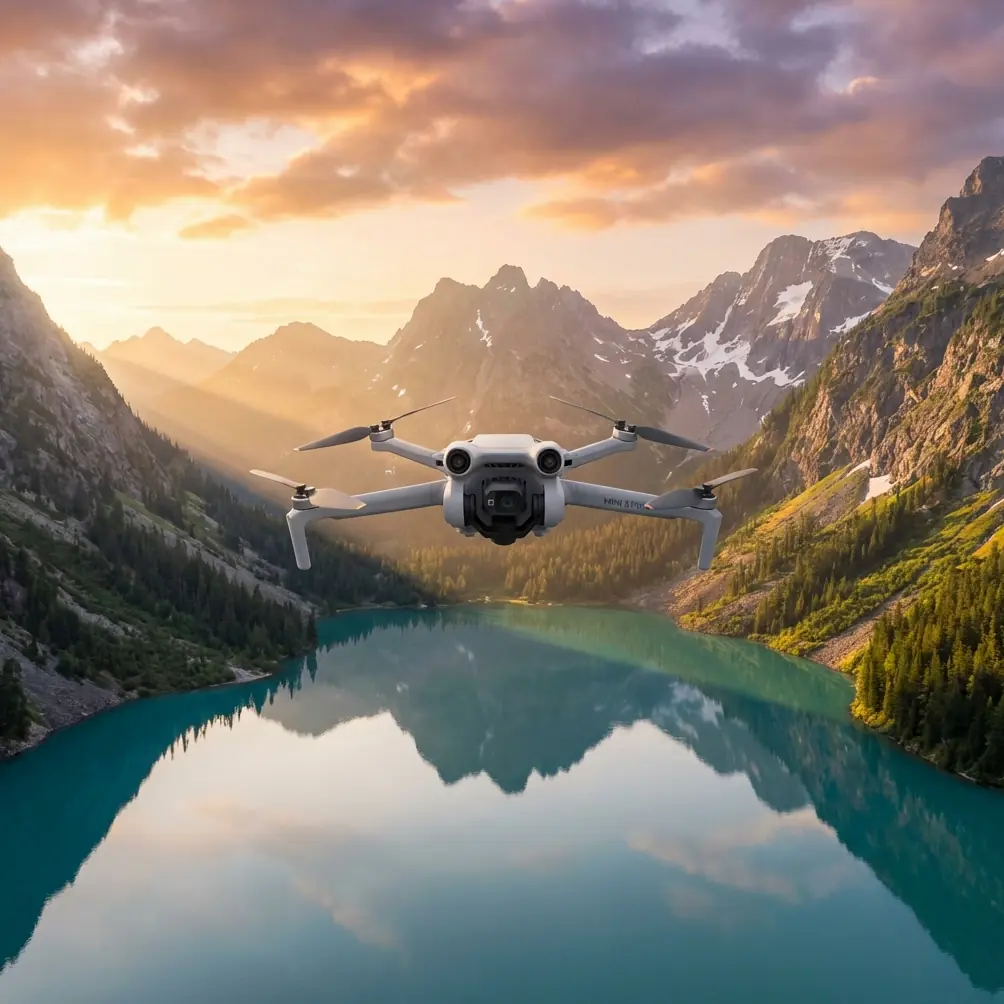
- The Mini 5 Pro weighs under 249g, making it exempt from many registration requirements while delivering professional-grade wildlife surveying capabilities
- ActiveTrack and obstacle avoidance systems solve the two biggest challenges of filming animals in dense, unpredictable environments
- D-Log color profile and Hyperlapse modes capture cinematic wildlife footage that rivals setups costing five times as much
- Electromagnetic interference management through manual antenna adjustment is the hidden skill that separates failed wildlife shoots from extraordinary ones
The Problem: Wildlife Surveying Pushes Consumer Drones to Their Limits
Wildlife surveying in rugged, complex terrain is one of the most demanding applications for any drone. The Mini 5 Pro addresses the critical pain points—subject tracking through canopy cover, collision avoidance near cliff faces, and signal stability in electromagnetically noisy environments—with a feature set that redefines what a sub-249g aircraft can accomplish. This guide breaks down exactly how to configure and fly the Mini 5 Pro for reliable, repeatable wildlife survey results.
I'm Jessica Brown, a wildlife and conservation photographer who has spent the last eight years documenting animal behavior from the air. I've crashed drones into redwood trunks, lost video feeds over volcanic rock, and watched thousands of hours of footage ruined by incorrect color profiles. Every mistake taught me something. The Mini 5 Pro is the first ultra-light platform that genuinely keeps up with the demands of professional fieldwork.
The core problem is simple to state and brutally hard to solve: animals don't cooperate. They move through ravines, under tree cover, across thermal updrafts, and into terrain that destroys GPS lock and chews through radio signals. Traditional survey drones are heavy, loud, and legally complicated to deploy in sensitive habitats. The Mini 5 Pro changes that equation entirely.
How Obstacle Avoidance Transforms Wildlife Fieldwork
Tri-Directional Sensing in Dense Environments
The Mini 5 Pro's tri-directional obstacle sensing system uses forward, backward, and downward sensors to build a real-time spatial map of its surroundings. In wildlife surveying, this matters most when you're flying below canopy level—threading between tree trunks at 2-3 meters altitude to track ground-dwelling species.
Traditional survey flights maintain safe altitudes above obstacles. That approach works for counting herds on open savanna. It fails completely when you need behavioral footage of a wolverine navigating a boulder field or a bird of prey returning to a cliff-face nest.
The obstacle avoidance system on the Mini 5 Pro enables three operational modes relevant to wildlife work:
- Bypass mode: The drone autonomously routes around detected obstacles while maintaining its tracking target
- Brake mode: The aircraft stops before collision, giving the pilot time to manually reposition
- Off mode: Full manual control for expert pilots in situations where sensor false-positives from water reflections or thin branches cause erratic behavior
- APAS 5.0 integration: Advanced Pilot Assistance combines sensor data with flight path prediction for smoother obstacle navigation
Expert Insight: In dense forest environments, I set obstacle avoidance to Brake mode rather than Bypass. Bypass mode can swing the drone laterally to avoid a branch, which often puts it directly behind another obstacle. Brake mode gives me a two-second window to assess and manually choose the best path. This approach has saved me from at least a dozen crashes during canopy-level surveys.
When Sensors Fail: Reading the Environment
No obstacle avoidance system is perfect. The Mini 5 Pro's sensors struggle with:
- Thin branches under 10mm diameter
- Transparent or highly reflective surfaces like still water
- Low-contrast obstacles in flat lighting conditions
- Fast-moving objects entering the sensor field from the side
Understanding these limitations isn't a weakness—it's a professional advantage. Knowing exactly where automation ends and pilot skill begins is what separates survey-grade footage from wrecked equipment.
Subject Tracking: ActiveTrack for Unpredictable Animals
Configuring ActiveTrack for Wildlife
ActiveTrack on the Mini 5 Pro allows you to draw a box around your subject on the controller screen. The drone then uses visual recognition to follow that subject through three-dimensional space. For wildlife, this feature is transformative—but only when configured correctly.
Key settings for wildlife ActiveTrack:
- Tracking sensitivity: Set to High for fast-moving animals like deer or raptors; Medium for slower species like tortoises or grazing ungulates
- Tracking altitude lock: Enable this to prevent the drone from descending into obstacles while following a subject moving downhill
- Speed ceiling: Cap flight speed at 80% of maximum to preserve battery and give obstacle avoidance systems time to react
- Subject size threshold: Larger bounding boxes reduce the chance of the system losing track when an animal partially disappears behind vegetation
The Limitations of Automated Tracking
ActiveTrack loses subjects in three common wildlife scenarios. First, when an animal enters heavy shadow beneath a rock overhang, contrast drops and the system struggles. Second, when multiple similar-looking animals cluster together—a herd of elk, a flock of birds—the tracker may jump between individuals. Third, rapid direction changes, like a rabbit zigzagging from a predator, can outpace the prediction algorithm.
For these situations, I switch to manual flight with subject tracking disabled and rely on the gimbal's manual follow controls. This hybrid approach—automated when conditions allow, manual when they don't—consistently produces the best survey footage.
Handling Electromagnetic Interference: The Skill Nobody Teaches
Here's the scenario that changed how I fly: I was surveying osprey nests along a river corridor in Montana. The terrain was gorgeous—red rock canyons, clear water, mature cottonwoods. My video feed started breaking up at 400 meters, well within the Mini 5 Pro's rated range. I was losing telemetry data. The drone was entering failsafe return-to-home mode every few minutes.
The problem wasn't the drone. It was the high-voltage transmission lines running parallel to the river, generating electromagnetic interference that overwhelmed the radio link.
Manual Antenna Adjustment Protocol
The Mini 5 Pro's controller uses two antennas embedded in the arms that fold out from the top of the unit. Signal strength depends heavily on the orientation of these antennas relative to the drone's position.
Follow this protocol for electromagnetically noisy environments:
- Step 1: Before launch, identify potential EMI sources—power lines, cell towers, metal-rich geological formations, nearby vehicles with running engines
- Step 2: Position yourself so the EMI source is behind you, placing your body as a partial shield between the interference and the controller
- Step 3: Angle the controller antennas so their flat faces point directly at the drone. The signal radiates perpendicular to the antenna surface
- Step 4: If interference persists, reduce your operating range by 30-40% from the rated maximum and fly at altitudes that maintain line-of-sight
- Step 5: Monitor the signal strength indicator continuously; if it drops below two bars, immediately bring the drone closer before attempting any complex maneuvers
Pro Tip: I carry a small compass and a notepad to log EMI hotspots during initial site reconnaissance. Before launching the Mini 5 Pro, I walk the area and note where my handheld radio scanner picks up strong signals. This five-minute habit has saved me countless interrupted survey flights and prevented at least two potential flyaway incidents.
D-Log and Color Science for Wildlife Documentation
Why D-Log Matters for Survey Footage
D-Log is a flat color profile that maximizes dynamic range by compressing highlights and shadows into the middle of the tonal range. For wildlife surveying, this serves two critical purposes.
First, it preserves detail in high-contrast scenes—an animal standing in dappled forest light, for instance, where standard color profiles would blow out sunlit patches or crush shadow detail. Second, it gives post-production flexibility to color-grade footage for different deliverables: scientific documentation, conservation fundraising videos, or editorial publication.
The Mini 5 Pro captures D-Log footage at 4K/30fps with a 150 Mbps bitrate, delivering enough color data for professional grading workflows.
QuickShots and Hyperlapse for Context Footage
Wildlife surveys need more than close-up animal tracking. Establishing shots that show habitat context are essential for scientific reports and conservation presentations.
- QuickShots Dronie: Pulls back from a GPS-marked point to reveal surrounding terrain
- QuickShots Circle: Orbits a fixed point to show 360-degree habitat context
- QuickShots Helix: Combines orbit with altitude gain for dramatic reveal shots
- Hyperlapse Free mode: Creates time-compressed footage of landscape changes, animal movement patterns over extended periods, or weather transitions across a survey area
Technical Comparison: Mini 5 Pro vs. Alternative Wildlife Survey Platforms
| Feature | Mini 5 Pro | Mid-Range Survey Drone | Professional Survey Drone |
|---|---|---|---|
| Weight | Under 249g | 600-900g | 1.2-4.5kg |
| Flight Time | Up to 35 min | 28-38 min | 35-55 min |
| Obstacle Avoidance | Tri-directional | Quad-directional | Omnidirectional |
| ActiveTrack | Yes (APAS 5.0) | Yes | Yes (advanced) |
| D-Log Support | Yes | Yes | Yes |
| Noise Level | Low | Moderate | High |
| Registration Required | No (under 249g) | Yes | Yes |
| Hyperlapse Modes | 4 modes | 2-4 modes | Limited |
| Portability | Foldable, pocket-sized | Backpack carry | Case required |
| Wind Resistance | Level 5 | Level 5-6 | Level 6-7 |
The Mini 5 Pro's decisive advantage for wildlife work isn't any single spec—it's the combination of sub-249g weight, low acoustic signature, and professional imaging features. Animals that spook from larger drones at 80 meters often tolerate the Mini 5 Pro at 30-40 meters, yielding dramatically better footage.
Common Mistakes to Avoid
Flying too high for meaningful data. Many operators default to safe altitudes of 50-100 meters. For behavioral wildlife surveys, you need 15-30 meters depending on species sensitivity. Practice low-altitude flying in open terrain before attempting it around animals.
Ignoring wind at launch versus wind at altitude. Ground-level calm means nothing. The Mini 5 Pro's light weight makes it vulnerable to gusts that start at 15-20 meters above ground. Check wind forecasts at your planned operating altitude, not at ground level.
Using standard color profiles for documentation. Shooting in standard or vivid modes destroys highlight and shadow data permanently. Always shoot in D-Log when footage will be used for analysis or professional output. You can always add contrast in post—you cannot recover clipped data.
Neglecting battery temperature management. Wildlife surveys often happen at dawn when temperatures are lowest and animal activity is highest. The Mini 5 Pro's battery performance drops significantly below 10°C. Warm batteries in an inside pocket before flight and monitor voltage closely during cold-weather operations.
Skipping pre-flight compass calibration in new locations. Mineral-rich terrain, common in mountainous wildlife habitat, causes compass errors that lead to erratic flight behavior. Calibrate the compass at every new survey site, every time—no exceptions.
Frequently Asked Questions
Can the Mini 5 Pro handle rain during wildlife surveys?
The Mini 5 Pro is not rated for wet weather operation. Light mist is generally tolerable for short periods, but rain presents serious risks to the motors, gimbal, and electronics. For wet-environment wildlife surveys, plan flights during dry windows and carry microfiber cloths to dry the aircraft immediately after landing. Condensation at altitude during temperature inversions is a hidden danger—monitor the camera feed for water droplet artifacts on the lens.
How close can I fly to wildlife without causing disturbance?
This depends entirely on the species, the environment, and local regulations. As a general framework, start at 100 meters distance and 50 meters altitude, then slowly decrease distance while monitoring animal behavior through the camera feed. Signs of disturbance include changes in movement direction, increased vigilance postures, vocalizations, and flight or flee responses. Many conservation areas have specific drone-wildlife distance requirements—check and follow them rigorously. The Mini 5 Pro's low noise profile gives it a meaningful advantage here, but no drone is silent.
Is the Mini 5 Pro sufficient for professional-grade wildlife survey reports?
Yes, with caveats. The 4K sensor, D-Log color profile, and GPS-tagged footage meet the requirements for most conservation surveys, habitat assessments, and population monitoring projects. The primary limitation is thermal imaging capability—the Mini 5 Pro lacks a thermal sensor, which is essential for nocturnal animal counts and certain vegetation health assessments. For projects requiring thermal data, you'll need a supplementary platform. For visual surveys, behavioral documentation, and habitat mapping, the Mini 5 Pro delivers professional results at a fraction of the weight and operational complexity of larger systems.
Ready for your own Mini 5 Pro? Contact our team for expert consultation.