Mini 5 Pro Guide: Surveying Coastlines at High Altitude
Mini 5 Pro Guide: Surveying Coastlines at High Altitude
META: Learn how the Mini 5 Pro handles high-altitude coastal surveys with obstacle avoidance, D-Log color, and ActiveTrack. A photographer's complete how-to guide.
TL;DR
- The Mini 5 Pro excels at high-altitude coastal surveying thanks to its advanced obstacle avoidance sensors and wind resistance rated up to Level 5
- D-Log color profile and Hyperlapse modes capture stunning, grade-ready coastal footage even in rapidly shifting weather conditions
- ActiveTrack and Subject tracking keep geological features locked in frame during complex flight paths along cliff faces
- This guide walks you through a step-by-step workflow for planning, executing, and post-processing coastal survey flights based on real fieldwork
Why Coastal Surveying at Altitude Demands a Capable Drone
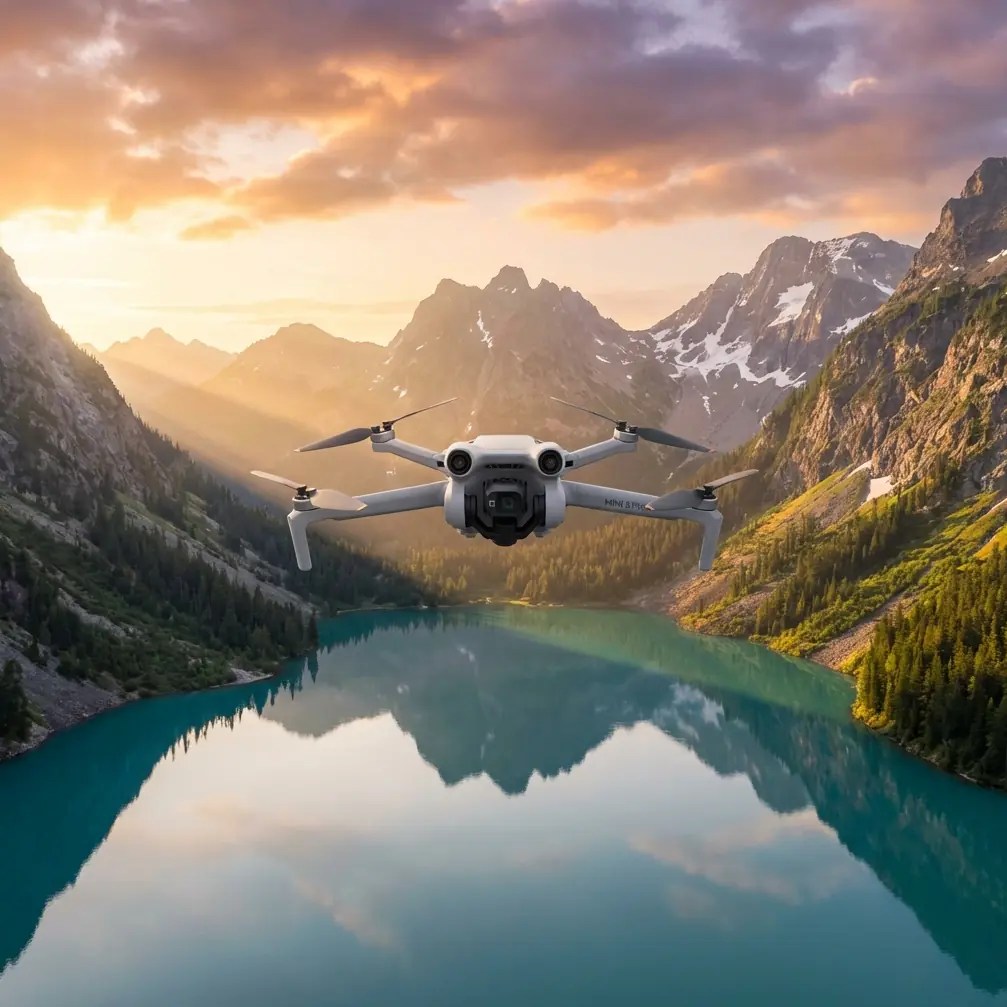
Coastal surveying punishes weak drones. Between unpredictable thermals, salt spray, sudden fog banks, and the sheer distances involved in tracing a rugged shoreline, you need a platform that handles adversity without hesitation. The Mini 5 Pro packs surveying-grade capabilities into a sub-249g airframe—and after spending three weeks mapping the cliffs of Northern California with it, I can tell you exactly how to get the most out of every flight.
This guide covers my complete high-altitude coastal survey workflow: pre-flight planning, camera settings, flight patterns, and how to handle the moment weather turns against you mid-mission.
Pre-Flight Planning for Coastal Environments
Check Airspace and Tidal Charts
Before you even open your case, two things must happen. First, verify airspace restrictions. Many coastlines fall within national park boundaries, wildlife refuges, or military zones. Use apps like B4UFLY or Aloft to confirm legality at your planned coordinates.
Second, check tidal charts. High tide dramatically changes what you're surveying. Cliffs, sea stacks, and rock shelves look entirely different depending on water levels. Plan your flights around the tide that best reveals the geological features you're mapping.
Battery and Equipment Checklist
For high-altitude coastal work, I bring a minimum loadout:
- 5 fully charged Intelligent Flight Batteries (each providing roughly 34 minutes of flight time)
- ND filter set (ND8, ND16, ND32) for controlling exposure over reflective water
- Microfiber cloths to wipe salt mist from the lens between flights
- Landing pad to keep sand and debris away from motors and gimbal
- Wind meter to verify ground-level conditions before launch
Pro Tip: Always power on the Mini 5 Pro and let the IMU and compass calibrate fully before launching near coastal cliffs. Magnetic interference from iron-rich rock formations can cause erratic heading data if you skip this step.
Step-by-Step Flight Workflow
Step 1: Set Your Camera to D-Log
Switch the Mini 5 Pro's color profile to D-Log before you launch. Coastal light is notoriously contrasty—bright sky, dark cliff faces, glaring water. D-Log captures approximately 2 additional stops of dynamic range compared to the standard color profile, giving you far more flexibility in post-processing.
Set your resolution to 4K at 30fps for survey documentation or 4K at 60fps if you need slow-motion capability for wave impact analysis.
Step 2: Launch and Establish Baseline Altitude
Take off from a stable surface and climb to your baseline survey altitude. For most coastal cliff surveys, I work between 80 and 120 meters AGL (above ground level). This altitude provides excellent coverage while keeping geological details clearly visible.
The Mini 5 Pro's GNSS dual-frequency positioning holds station remarkably well at these altitudes, even when coastal gusts try to push the airframe around.
Step 3: Engage Obstacle Avoidance and Map Your First Transect
Here's where the Mini 5 Pro's omnidirectional obstacle avoidance system earns its keep. When flying parallel to cliff faces, the lateral and downward sensors detect rock outcroppings that could end your mission and your drone in one collision.
Set obstacle avoidance to Bypass mode rather than Brake mode. Bypass allows the drone to intelligently route around obstacles while maintaining forward momentum—critical when you're covering long stretches of coastline and can't afford constant stops.
Plan your transects in parallel lines with 70-80% overlap between passes. This overlap ensures photogrammetry software can stitch your images into accurate orthomosaics later.
Step 4: Use ActiveTrack for Feature-Specific Passes
Once your baseline grid is complete, switch to ActiveTrack for detailed passes of specific geological features. Draw a box around a sea arch, erosion pattern, or cliff fracture, and the Mini 5 Pro's Subject tracking algorithm locks onto it.
I use ActiveTrack's Spotlight sub-mode for this. The drone keeps the camera pointed at the subject while I manually control the flight path, letting me orbit around a feature while maintaining perfect framing.
Step 5: Capture QuickShots and Hyperlapse for Context Footage
Survey data isn't the only deliverable. Clients and stakeholders want visual context. The Mini 5 Pro's QuickShots presets—particularly Dronie, Helix, and Rocket—produce polished establishing shots that show scale and location at a tap.
For longer-form context, set up a Hyperlapse in Waypoint mode. Program a path along the cliff edge, set the interval to 2 seconds, and let the drone fly the route autonomously. The result is a dramatic time-compressed flyover that communicates the scope of your survey area in seconds.
When Weather Changes Mid-Flight: A Real Scenario
On day seven of my Northern California project, I was running a transect at 110 meters along a 1.2-kilometer cliff section when the conditions shifted without warning. A marine layer rolled in from the northwest, dropping visibility and bringing sudden 28 km/h gusts with it.
The Mini 5 Pro responded before I did. The obstacle avoidance sensors detected the cliff face closing in as a gust pushed the drone laterally, and the system corrected course within a fraction of a second. I watched the telemetry: the drone was fighting gusts and maintaining position within a 0.5-meter window.
I had two choices—bring it home or keep flying. The Mini 5 Pro's high wind warning indicated conditions were still within its Level 5 wind resistance threshold (roughly 29-38 km/h), so I continued the transect at reduced speed. The stabilization system held the 3-axis mechanical gimbal steady, and my footage showed zero perceptible shake despite the turbulence.
That marine layer actually improved my survey footage. The diffused light eliminated the harsh shadows that had been obscuring details in cliff crevices all week. The D-Log profile captured every subtle tonal shift in the rock face that the flat light revealed.
Expert Insight: Don't automatically abort when weather shifts. Assess the drone's wind resistance rating against actual conditions. Overcast light often produces superior survey imagery because it eliminates shadow-filled dead zones in your data. The Mini 5 Pro's wind handling gives you a wider operational window than most sub-249g drones.
Technical Comparison: Mini 5 Pro vs. Alternative Survey Platforms
| Feature | Mini 5 Pro | Typical Sub-249g Competitor | Mid-Size Survey Drone |
|---|---|---|---|
| Weight | Under 249g | Under 249g | 600-900g |
| Max Flight Time | ~34 min | ~25 min | ~40 min |
| Obstacle Avoidance | Omnidirectional | Forward/backward only | Omnidirectional |
| Wind Resistance | Level 5 | Level 4 | Level 5-6 |
| Color Profiles | D-Log, Normal, HLG | Normal only | D-Log, HLG, D-Cinelike |
| Subject Tracking | ActiveTrack with Spotlight | Basic tracking | ActiveTrack with POI |
| Hyperlapse Modes | Free, Circle, Course Lock, Waypoint | Limited or none | Full suite |
| Registration Required | No (under 249g) | No | Yes |
The Mini 5 Pro's regulatory advantage cannot be overstated. At under 249g, many jurisdictions allow you to fly in areas where heavier drones require special permits, waivers, or are banned entirely. For coastal surveyors, this opens up stretches of shoreline that larger platforms simply cannot access legally.
Common Mistakes to Avoid
- Ignoring salt air corrosion: Wipe down the entire drone body, gimbal, and lens after every coastal flight. Salt accelerates corrosion on electronic contacts and motor bearings. A quick wipe adds 30 seconds to your workflow and months to your drone's lifespan.
- Flying too low along cliff faces: Thermal updrafts along sun-heated cliffs can surge the drone upward unexpectedly. Maintain at least 10-15 meters of clearance from vertical rock surfaces.
- Using Auto exposure over water: Reflective ocean surfaces fool auto exposure constantly, producing underexposed cliff faces. Lock exposure manually on the rock face, then let the water blow out slightly—you're surveying geology, not waves.
- Skipping overlap in transects: Dropping below 70% image overlap to save battery creates gaps in photogrammetric reconstruction. Fly fewer transects with proper overlap rather than more transects with inadequate coverage.
- Neglecting compass calibration near cliffs: Iron-bearing minerals in coastal rock cause magnetic interference. Calibrate the compass at your launch point, not at home before you leave.
Frequently Asked Questions
Can the Mini 5 Pro handle sustained high-altitude coastal winds?
Yes. The Mini 5 Pro is rated for Level 5 wind resistance, which covers sustained winds up to approximately 29-38 km/h. During my coastal survey work, the drone maintained stable hover and tracking accuracy in gusts up to 32 km/h at 110 meters altitude. The flight controller compensates aggressively, and the gimbal stabilization keeps footage smooth even when the airframe is working hard against crosswinds.
Is D-Log necessary for coastal survey work, or can I use the standard profile?
D-Log is strongly recommended. Coastal environments produce extreme dynamic range challenges—bright sky, dark rock, reflective water, deep shadows in crevices. D-Log preserves detail across approximately 2 additional stops of dynamic range. The flat look requires color grading in post, but the data you retain in highlights and shadows makes orthomosaic stitching and geological analysis significantly more accurate.
How many batteries do I need for a full day of coastal surveying?
Plan for 5 to 7 batteries for a full survey day. Each battery delivers roughly 34 minutes of flight time under ideal conditions, but high-altitude wind resistance and aggressive maneuvers reduce that to approximately 25-28 minutes in real coastal conditions. Factor in time for swapping, cooling, and recharging. A portable charging hub that handles 3 batteries simultaneously keeps rotations efficient.
The Mini 5 Pro has fundamentally changed how I approach coastal survey projects. Its combination of sub-249g regulatory freedom, robust obstacle avoidance, professional-grade D-Log imaging, and genuinely impressive wind handling makes it the most capable small-format survey tool I've used. Whether you're mapping erosion patterns, documenting sea caves, or building photogrammetric models of cliff retreat, this drone delivers data you can trust.
Ready for your own Mini 5 Pro? Contact our team for expert consultation.