Mini 5 Pro Best Practices for Wildlife Filming in Dusty Cond
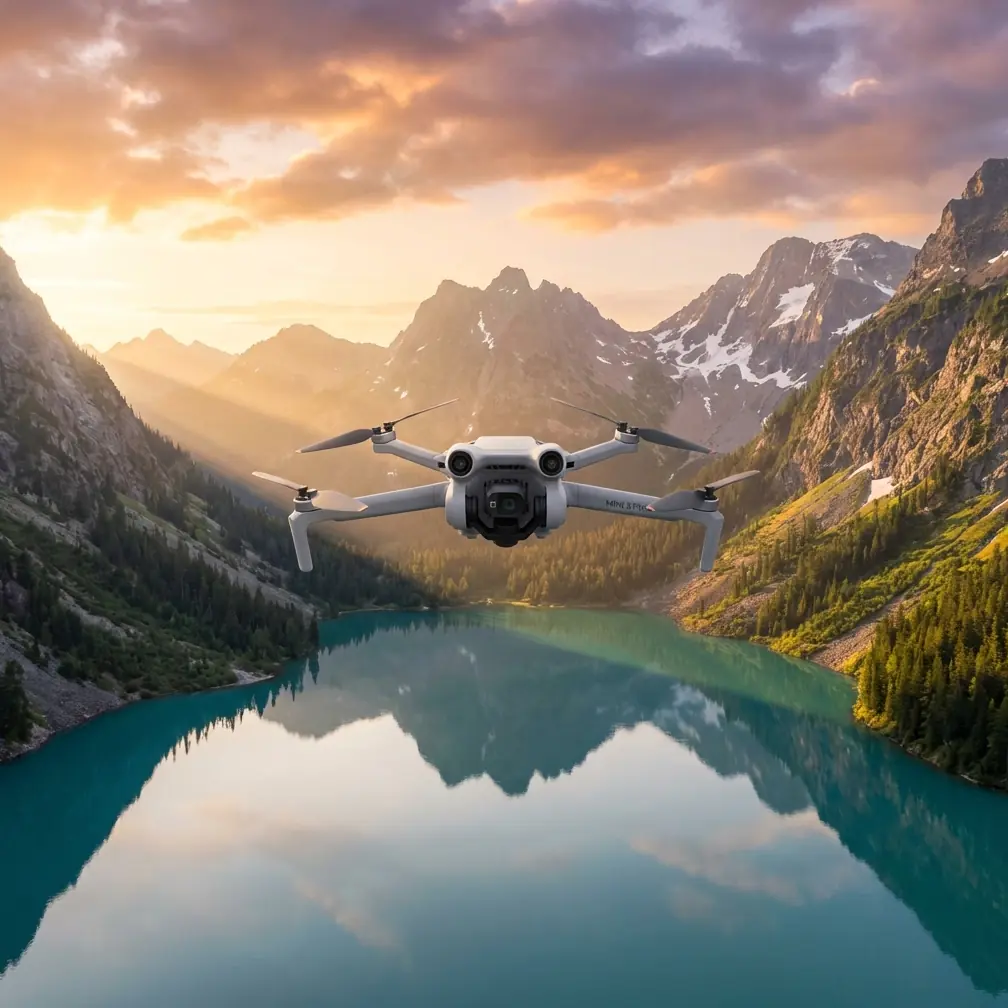
Mini 5 Pro Best Practices for Wildlife Filming in Dusty Conditions
META: A practical Mini 5 Pro filming guide for dusty wildlife shoots, with field tactics for obstacle avoidance, ActiveTrack, D-Log capture, and antenna positioning inspired by real-world drone delivery limits.
When people talk about the future of drones, they often jump straight to bold promises. One of the clearest examples came when Amazon outlined a vision of drone delivery within 30 minutes, using GPS navigation to reach customers inside a 16-kilometer radius from a warehouse. That idea grabbed attention fast. It also exposed something professionals already understand: range claims and delivery timelines sound simple in a presentation, but real operations are shaped by terrain, signal quality, air conditions, dust, visibility, and the unpredictable behavior of whatever is moving below.
That is exactly the right lens for thinking about the Mini 5 Pro in the field.
If your goal is filming wildlife in dusty environments, the drone’s headline features matter less than your ability to use them with restraint and technical judgment. Obstacle avoidance, subject tracking, QuickShots, Hyperlapse, D-Log, and ActiveTrack all have a place. None of them remove the need for disciplined setup. In dusty country, small mistakes become visible fast: soft footage from haze, unstable tracking against low-contrast backgrounds, sensor hesitation near scrub, and signal drop caused by poor controller orientation.
I shoot wildlife with the assumption that the environment is always stronger than the spec sheet. That mindset leads to cleaner footage, safer flights, and fewer ruined sessions.
Start with the reality of range, not the fantasy of range
The Amazon delivery concept depended on GPS navigation and a defined service area within 16 kilometers of a logistics point. Operationally, that detail matters because it shows how drone performance is always tied to a controlled envelope. Even in a highly resourced logistics scenario, distance is not just about whether the aircraft can physically travel far enough. It is about whether the system can do so reliably, repeatedly, and safely.
For a Mini 5 Pro wildlife shoot, the lesson is straightforward: do not plan your session around maximum advertised range. Plan around stable control, clean video transmission, and enough battery margin to handle wind, subject movement, and unexpected repositioning.
In dusty habitats, visibility can flatten the scene and make distance harder to judge. Wildlife may also pull you farther than intended as you try to maintain framing without disturbing the animal. That is where discipline matters. Keep your working radius conservative. If the subject moves out beyond the distance where you can confidently read both its behavior and your aircraft orientation, reset rather than chase.
The best wildlife footage usually comes from controlled repetition, not heroic reach.
Dust changes everything before takeoff
Dust is not just a cleanliness issue. It affects the whole capture chain.
First, it reduces local contrast. Even when the air looks clear to the eye, fine suspended dust can mute separation between an animal and the background. That directly affects subject tracking and obstacle detection. Second, dust on the lens turns highlights ugly fast, especially in low-angle morning or late-afternoon light. Third, a dusty launch zone increases the chance of debris being kicked up during takeoff and landing, which can compromise image clarity before the flight has even started.
My workflow is simple:
- Launch from the cleanest elevated surface available.
- Avoid hand launches if animal behavior or terrain makes your stance unstable.
- Check the lens immediately before power-up, not five minutes earlier.
- Pause after takeoff at a safe hover and inspect live view for contrast loss or flare.
This matters even more if you plan to grade D-Log footage later. Flat profiles preserve flexibility, but they also make low-contrast scenes look even thinner in the field monitor. If dust is already compressing the scene, your exposure judgment has to be precise.
Use obstacle avoidance as a buffer, not a crutch
Obstacle avoidance is one of the most useful tools on the Mini 5 Pro for wildlife work, especially around broken terrain, dry branches, rock outcrops, and sparse tree lines that are easy to underestimate from a pilot’s screen. But dusty conditions complicate how you should interpret that safety net.
Fine particulate haze can reduce the clarity of what the system sees. Dry brush also creates a classic edge-case problem: it may be visually present, but not always registered as confidently as a solid trunk or wall. Add shifting light and moving animals, and the pilot can become overconfident because the system appears capable in testing flights.
My rule is to use obstacle avoidance to widen my margin, not to narrow my judgment. If I am filming a deer line crossing dry scrub or birds lifting from a dusty plain, I still fly a route that would be safe even if the sensors were less decisive than usual.
That gives you two benefits. Safety is the obvious one. The second is footage quality. When you stop relying on automation to thread tight gaps, your camera movement becomes calmer. Wildlife footage improves when the aircraft looks deliberate, not reactive.
ActiveTrack works best when you choose the right subject behavior
ActiveTrack is powerful, but it is not magic. In dusty wildlife scenarios, the biggest factor is not the drone. It is the behavior of the animal.
If the subject moves predictably across open terrain with clear separation from the background, tracking can hold beautifully. If the animal darts through brush, changes direction sharply, or blends tonally with dry ground, expect interruptions or hesitation. Dust makes those transitions harder because it lowers edge definition right when the algorithm needs confidence.
A better strategy is to reserve ActiveTrack for sustained movement phases rather than the entire encounter. For example:
- Use manual positioning while the subject is partially obscured.
- Begin ActiveTrack once it enters open ground.
- Exit tracking early before vegetation, ridgelines, or dust plumes complicate the scene.
That approach gives you footage that feels intentional instead of over-automated. It also reduces the temptation to keep the drone in the air too long waiting for tracking to recover.
QuickShots and Hyperlapse are useful, but only when the environment is stable
A lot of pilots treat QuickShots as social features. In wildlife filming, that is the wrong mindset. Used carefully, they can create elegant establishing sequences that show habitat scale without aggressive pilot input. The key phrase is used carefully.
If you are filming in dust, automated movement patterns can exaggerate haze and reveal unstable atmospheric layers. A fast reveal over dry ground may look dramatic in live view, then disappoint later because the background turns milky and the subject loses visual priority.
QuickShots work best when the animal is stationary, the air is settled, and the light is directional enough to separate the subject from the terrain. Hyperlapse can be even more effective for setting location context before or after the wildlife moment, especially when you want to show changing light over a dry valley, waterhole, or migration corridor without disturbing the scene.
I would not use either mode as my primary tool during active wildlife movement. For that, clean manual control usually wins.
D-Log is worth using if you expose for recovery, not for hope
D-Log gives you room to manage harsh highlights and shape color later, which is valuable in dusty locations where skies can stay bright while the ground looks muted and pale. But D-Log is only an advantage if the original exposure is disciplined.
Dust tends to fool people into underexposing. The scene looks washed out, so they protect highlights too aggressively and end up starving the image. Then in post they lift shadows, and the dust haze becomes more obvious while detail falls apart.
Expose with intent. Protect critical highlights, yes, but do not let the subject become a flat silhouette against a chalky landscape unless that is a deliberate aesthetic choice. Wildlife footage lives or dies on texture: fur detail, feather edge, eye contrast, shoulder movement, dust kicked from the ground. If those details are weak, no color grade will rescue the shot.
Antenna positioning: the small habit that saves flights
This is the field habit I wish more pilots took seriously.
If you want the best possible range and signal stability from the Mini 5 Pro, pay attention to antenna orientation on the controller. Do not point the tips directly at the aircraft as if they were laser pointers. Position them so the broad faces are presented toward the drone. That gives the transmission pattern its best chance to stay strong.
Why does this matter so much in wildlife filming? Because signal problems rarely happen at a convenient moment. They happen when the animal finally moves into the open, when you have edged around terrain for a cleaner angle, or when low contrast already makes the live view harder to read.
Remember the Amazon example: a drone plan built around GPS and a specific delivery radius still faced real-world skepticism, with experts suggesting true large-scale viability was at least four or five years away. That gap between concept and field reality exists because signal, route reliability, environment, and edge conditions decide outcomes. Your Mini 5 Pro shoot is smaller in scale, but governed by the same principle. Technical discipline beats optimistic assumptions.
Antenna checklist in the field:
- Keep the controller oriented toward the aircraft’s general position.
- Adjust antenna faces, not just body posture.
- Avoid standing behind vehicles, rock walls, or metal fencing.
- Reposition yourself early if terrain begins to block line of sight.
- Do not wait for the video feed to degrade before correcting.
That last point matters most. Signal management is preventive work.
Build a wildlife workflow around minimal disturbance
The Mini 5 Pro’s smartest features are only useful if the animals accept your presence. Dusty habitats often amplify sound because open ground gives the aircraft fewer surfaces to hide behind. The result is that a technically perfect flight path can still be a bad wildlife decision.
I structure flights in three phases.
Phase one is reconnaissance at a respectful stand-off distance. This is where obstacle avoidance, transmission stability, and exposure checks matter most. Phase two is the filming pass, usually short, with either manual framing or selective ActiveTrack. Phase three is disengagement, which should be smoother and quicker than most people make it. Lingering after the shot is how you create stress responses and spoil future behavior.
If you are unsure whether your setup is appropriate for a particular dusty wildlife location, sharing your scene and flight goals with an experienced operator can save a wasted day. I usually recommend getting a second technical opinion before a major trip, and this is a practical way to do it: message a drone specialist here.
A practical shooting template for dusty wildlife days
When the location is dry, visibility is variable, and animal movement is hard to predict, simplicity wins.
Here is the approach I trust most:
Arrive early, before heat and airborne dust build. Pick a launch point that gives you a clean vertical departure and clear line of sight. Clean the lens at the last possible moment. Start with manual flight and use the first minute to evaluate contrast, wind drift, and controller signal quality. Keep obstacle avoidance active, but fly as though it were only there to catch your mistakes, not plan your route.
If the subject settles into open, readable movement, use ActiveTrack for a limited sequence. If the background becomes cluttered or the animal’s path turns erratic, return to manual control immediately. Capture a few habitat-wide clips with slow, measured movement rather than relying on flashy motion patterns. If the air is stable and the scene supports it, add one QuickShot or a short Hyperlapse to establish the environment. Shoot in D-Log when the light range justifies it and when you know you have enough subject contrast to grade effectively later.
Throughout the flight, manage your antennas deliberately. That habit sounds mundane until it prevents the exact signal wobble that would have ruined the best moment of the morning.
The real advantage of the Mini 5 Pro in this environment
For dusty wildlife work, the Mini 5 Pro is not at its best when you ask it to do everything. It is at its best when you use the right feature at the right time, and leave the rest alone.
Obstacle avoidance protects your margin. ActiveTrack helps during clean movement. QuickShots and Hyperlapse can build context. D-Log preserves flexibility when the light is unforgiving. Proper antenna positioning keeps the connection dependable. Put together, those choices create a more professional result than simply leaning on automation.
That is the difference between drone marketing and drone fieldcraft.
The broader drone industry has been dealing with that tension for years. Public visions, like a GPS-guided drone delivering within 30 minutes across a 16-kilometer radius, are useful because they force people to imagine what is possible. They are less useful as operating doctrine. Experts were right to say those ideas still faced at least four to five years of real-world obstacles. In wildlife filmmaking, you do not need to wait years to learn the same lesson. The environment tells you immediately.
Respect the conditions. Fly conservatively. Let the Mini 5 Pro support your judgment, not replace it.
Ready for your own Mini 5 Pro? Contact our team for expert consultation.