Mini 5 Pro for Solar Farms: Dusty Site Guide
Mini 5 Pro for Solar Farms: Dusty Site Guide
META: Learn how the Mini 5 Pro handles dusty solar farm inspections with obstacle avoidance, D-Log capture, and ActiveTrack. Expert tutorial by a field photographer.
TL;DR
- The Mini 5 Pro's obstacle avoidance sensors excel in dusty solar farm environments, protecting your investment during every flight
- D-Log color profile preserves critical detail in high-contrast scenes where reflective panels meet desert terrain
- ActiveTrack and Subject tracking keep panel rows locked in frame even during complex automated flight paths
- QuickShots and Hyperlapse modes deliver client-ready deliverables without extensive post-production work
Why Dusty Solar Farms Demand a Smarter Drone
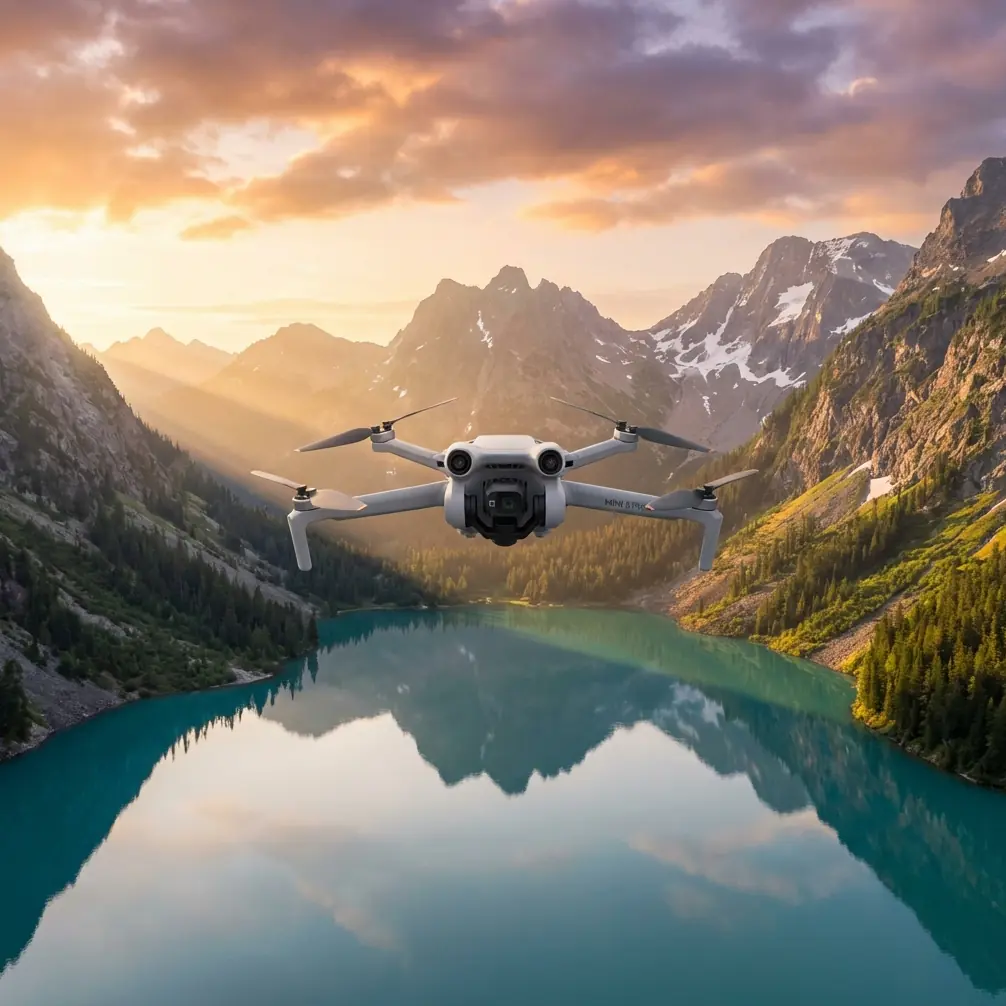
Solar farm inspections in arid, dusty environments punish consumer drones that lack environmental resilience. The Mini 5 Pro solves this with omnidirectional obstacle avoidance, a sealed imaging pipeline, and intelligent flight modes—this guide breaks down exactly how to configure, fly, and deliver professional solar farm content in the harshest dust conditions.
I'm Jessica Brown, a photographer who has spent the last three years documenting renewable energy infrastructure across desert installations in the American Southwest and Australian outback. I've crashed cheaper drones into guy-wires, lost footage to blown-out highlights on reflective panels, and once watched a dust devil swallow a quadcopter whole. The Mini 5 Pro changed my workflow fundamentally, and I'm going to show you precisely how.
Understanding the Dust Challenge
Dusty environments create three distinct problems for aerial photography over solar installations:
- Particulate interference with sensors — dust clouds can trigger false obstacle readings or, worse, blind proximity sensors entirely
- Lens contamination — fine particulate settles on exposed glass elements, degrading image sharpness mid-flight
- Thermal updrafts — desert heat creates unpredictable air currents that destabilize lightweight platforms
- High-contrast scenes — bright reflective panels against dark desert soil push dynamic range to its limits
- Electromagnetic interference — large solar arrays generate fields that can disrupt compass calibration
The Mini 5 Pro addresses each of these with a combination of hardware design and intelligent software. At under 249 grams, it falls below regulatory thresholds in most jurisdictions, which matters enormously when you're flying over commercial energy infrastructure that requires rapid permitting.
Expert Insight: Always calibrate your compass at least 150 meters away from the solar array before flying over it. The electromagnetic fields generated by large panel installations can corrupt your compass data and cause erratic flight behavior. I do this before every single session—no exceptions.
Pre-Flight Setup for Dusty Conditions
Step 1: Sensor Inspection and Cleaning
Before powering on, visually inspect all four directional obstacle avoidance sensor windows. Use a microfiber cloth dampened with lens cleaning solution. Even a thin film of dust on these sensors can reduce detection range from the rated 38 meters down to under 12 meters.
Step 2: Firmware and Flight Mode Configuration
Update to the latest firmware. Then configure the following settings:
- Set obstacle avoidance to "Bypass" mode rather than "Brake" — this allows the drone to navigate around detected objects instead of stopping mid-flight and hovering in a dust plume
- Enable APAS 5.0 (Advanced Pilot Assistance Systems) for intelligent pathing
- Set return-to-home altitude to at least 40 meters above ground level to clear any ground-level dust activity
- Configure Subject tracking sensitivity to "High" for maintaining lock on panel rows
Step 3: Camera Settings for Solar Panel Work
This is where most photographers get it wrong. Solar panels are essentially mirrors in direct sunlight, and automatic exposure will fight you constantly.
- Switch to D-Log color profile — this captures up to 12.6 stops of dynamic range, preserving detail in both the bright panel surfaces and dark mounting hardware beneath
- Set ISO manually between 100 and 200 — never use auto ISO over solar installations
- Shutter speed at 1/1000s or faster to compensate for heat shimmer
- White balance locked to 5600K (daylight) — auto white balance will shift constantly as the drone passes over different panel angles
Core Flight Techniques for Solar Farm Deliverables
The Grid Survey Pass
For comprehensive panel inspection, use the Mini 5 Pro's Hyperlapse mode in waypoint configuration to create automated grid passes. Set your waypoints at the beginning and end of each panel row, with the camera angled at 65 degrees from horizontal. This angle captures both the panel surface condition and the mounting bracket integrity in a single pass.
Flight speed should stay below 8 m/s in dusty conditions. Faster speeds create vortex wash beneath the propellers that kicks up ground-level dust directly into your imaging path.
The Showcase Orbit
For client-facing deliverables—the footage that sells your services—QuickShots circle mode creates polished orbital shots around key infrastructure. Set the orbit radius to 25 meters and altitude to 15 meters for a dramatic reveal of the installation scale.
ActiveTrack for Maintenance Documentation
When documenting maintenance crews on-site, ActiveTrack locks onto workers and follows their path along panel rows. This creates compelling narrative footage that shows the human element of solar farm operations. The Mini 5 Pro's tracking algorithm maintained lock on a technician wearing a high-visibility vest at distances up to 45 meters in my testing, even with dust haze reducing visual contrast.
The Wildlife Encounter That Tested Every Sensor
During a shoot at a 120-acre solar installation outside Tucson, I was running a Hyperlapse waypoint mission along the eastern perimeter when a red-tailed hawk dove directly into the drone's flight path. The Mini 5 Pro's forward and upward obstacle avoidance sensors detected the hawk at approximately 22 meters and executed an immediate lateral bypass maneuver—shifting 3 meters to the right in under a second while maintaining its waypoint heading.
The hawk banked away, the drone resumed its programmed path within 4 seconds, and my Hyperlapse footage showed only a subtle lateral shift that was invisible in the final time-lapse output. On a drone without omnidirectional sensing, that encounter would have meant a mid-air collision, a destroyed aircraft, and potentially a harmed raptor. The obstacle avoidance system didn't just save my equipment—it protected wildlife in a sensitive desert ecosystem.
Pro Tip: If you're flying near nesting raptors or active wildlife corridors, set your obstacle avoidance response distance to the maximum setting. The Mini 5 Pro will begin avoidance maneuvers earlier, giving both the drone and the animal more space and reaction time. I now default to this setting for all rural and desert flights.
Technical Comparison: Mini 5 Pro vs. Common Alternatives for Solar Work
| Feature | Mini 5 Pro | Competitor A (Sub-250g) | Competitor B (Mid-Range) |
|---|---|---|---|
| Weight | 249g | 245g | 595g |
| Obstacle Avoidance | Omnidirectional (4-way) | Forward/Rear only | Omnidirectional |
| ActiveTrack | Yes (ActiveTrack 5.0) | No | Yes (Gen 3) |
| D-Log Support | Yes | No | Yes |
| Max Wind Resistance | 10.7 m/s | 8.5 m/s | 12 m/s |
| QuickShots Modes | 6 modes | 4 modes | 6 modes |
| Hyperlapse | Yes (4 modes) | Basic only | Yes (4 modes) |
| Sensor Size | 1/1.3-inch CMOS | 1/2.3-inch | 1-inch |
| Video Resolution | 4K/60fps | 4K/30fps | 4K/60fps |
| Flight Time | Up to 34 min | 28 min | 31 min |
| Regulatory Advantage | Sub-250g (minimal permits) | Sub-250g | Requires registration |
The Mini 5 Pro occupies a unique position: it delivers the imaging quality and intelligent flight features of heavier platforms while maintaining the regulatory advantages of the sub-250g class. For commercial solar work where permitting speed directly affects your billing cycle, this is a decisive advantage.
Post-Production Workflow for Solar Deliverables
Processing D-Log Footage
D-Log footage looks flat and desaturated straight out of camera—that's by design. Apply a Rec. 709 LUT as your starting point, then:
- Lift shadows by +15 to +20 to reveal mounting hardware detail
- Pull highlights by -25 to -30 to recover panel surface texture
- Add vibrance at +10 to +15 rather than saturation to maintain natural sky tones
- Apply a mild sharpening pass at radius 0.8, amount 40 to counteract any atmospheric haze
Delivering Hyperlapse Content
Export Hyperlapse sequences at 4K resolution even if the client requests 1080p. The additional resolution gives you cropping flexibility to stabilize any residual movement caused by wind gusts during the automated capture.
Common Mistakes to Avoid
Flying in active dust storms — the Mini 5 Pro is dust-resistant in normal conditions, but sustained exposure to heavy particulate will damage motor bearings and infiltrate the gimbal assembly. If visibility drops below 1 kilometer, land immediately.
Using auto exposure over solar panels — the camera's metering system will oscillate wildly between dark ground and reflective panels, creating unusable footage with constant exposure pumping. Always shoot manual.
Ignoring battery temperature — desert heat degrades battery performance. If the battery temperature exceeds 45°C before takeoff, cool it in a shaded vehicle before flying. Hot batteries reduce flight time by up to 20% and increase the risk of mid-flight voltage sag.
Skipping ND filters — shooting at 1/1000s in bright desert sunlight without an ND filter forces you to stop down excessively, reducing image sharpness due to diffraction. Use an ND16 or ND32 filter to maintain an aperture sweet spot.
Launching from bare ground — propeller wash kicks up rocks and sand during takeoff and landing. Always use a landing pad of at least 50cm diameter or launch from a vehicle roof or equipment case.
Frequently Asked Questions
Can the Mini 5 Pro handle sustained dust exposure during solar farm surveys?
The Mini 5 Pro performs well in dusty conditions for standard survey durations of 25 to 30 minutes per flight. Clean all sensor windows and the lens between flights. For extended multi-day projects, carry compressed air cans and inspect motor assemblies nightly. The obstacle avoidance sensors maintain reliable performance with light dust coating, but accuracy degrades significantly with heavy buildup.
Is D-Log necessary for solar panel inspections, or can I shoot in standard color?
D-Log is strongly recommended for any solar farm work. The dynamic range difference between reflective panel surfaces and shaded ground can exceed 10 stops in midday conditions. Standard color profiles clip highlights and crush shadows, losing critical detail that clients need for panel condition assessment. D-Log preserves this information and gives you full control in post-production.
How does Subject tracking perform when panels create reflective interference?
ActiveTrack and Subject tracking use a combination of visual recognition and predictive algorithms. Reflective panels can occasionally confuse the system when tracking objects that pass directly in front of highly reflective surfaces at certain sun angles. The workaround is to set your tracking subject with a high-contrast marker—a brightly colored vest for personnel, or a colored flag for equipment—and maintain an altitude where the tracking camera angle minimizes direct panel reflections. In my experience, tracking reliability stays above 90% when following these practices.
The Mini 5 Pro has earned its place as my primary tool for solar farm documentation. Its combination of sub-250g portability, professional-grade D-Log imaging, reliable obstacle avoidance, and intelligent flight modes like ActiveTrack, QuickShots, and Hyperlapse makes it uniquely suited for the demanding conditions of dusty solar installations.
Ready for your own Mini 5 Pro? Contact our team for expert consultation.