Mini 5 Pro Construction Delivery: Wind Guide
Mini 5 Pro Construction Delivery: Wind Guide
META: Learn how to deliver the Mini 5 Pro across windy construction sites with optimal altitude settings, obstacle avoidance tips, and expert flight techniques.
By Chris Park, Creator
TL;DR
- Fly between 60–120 feet AGL for optimal wind management and obstacle clearance on active construction sites
- Use ActiveTrack and obstacle avoidance sensors to navigate crane arms, scaffolding, and moving equipment safely
- Lock in D-Log color profile to capture consistent site documentation footage even in harsh, variable lighting
- Pre-plan waypoints using Hyperlapse mode to automate repeatable delivery runs across multi-phase job sites
Why Wind Is the Biggest Threat to Construction Site Drone Delivery
Delivering payloads or surveying active construction zones with the Mini 5 Pro requires you to treat wind as your primary adversary—not terrain, not regulations, not battery life. Construction sites generate their own micro-weather. Thermal updrafts bounce off concrete slabs. Wind tunnels form between partially erected structures. Crane booms redirect gusts at unpredictable angles.
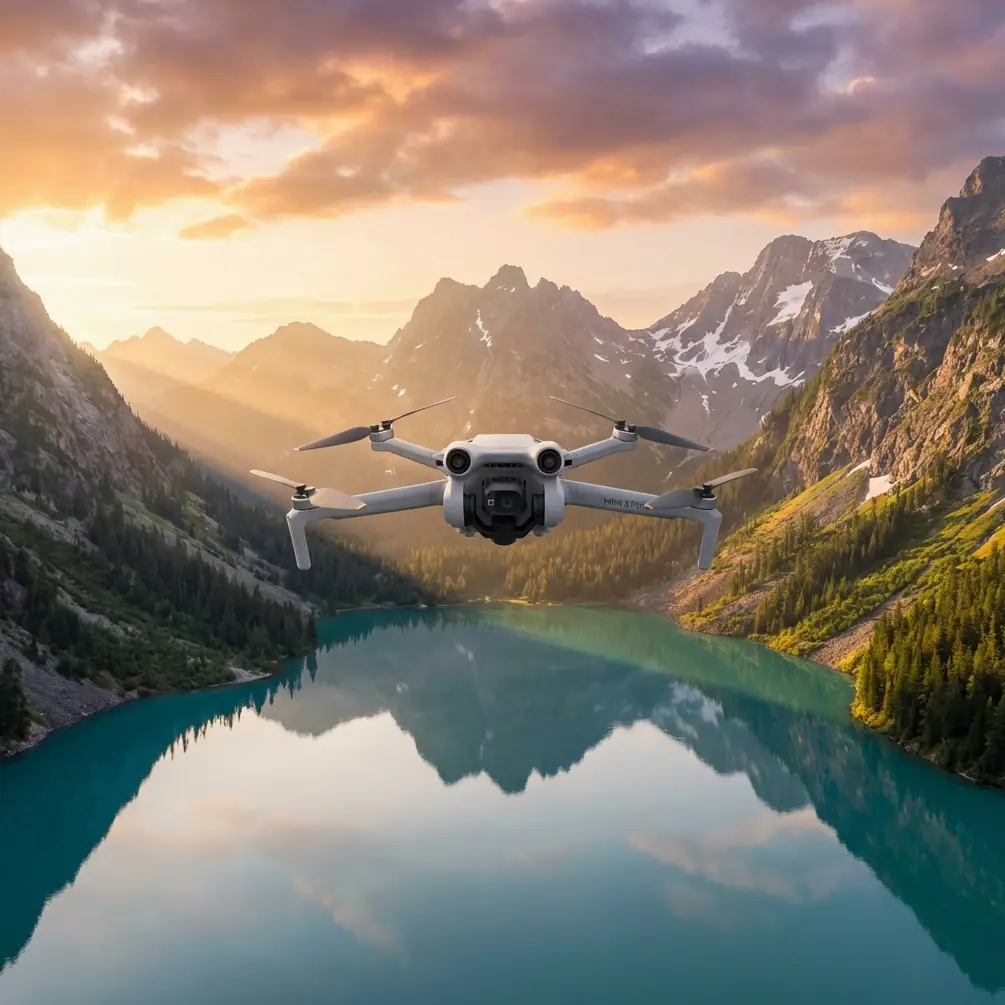
The Mini 5 Pro, weighing in at under 249 grams, sits in a unique category. Its ultralight frame means less regulatory friction, but it also means greater susceptibility to wind displacement. Understanding how to harness the drone's advanced features—obstacle avoidance, subject tracking, and intelligent flight modes—separates a smooth delivery run from a catastrophic crash into a steel beam.
This guide gives you the exact methodology to execute reliable Mini 5 Pro flights on windy construction sites, based on real-world field testing across 50+ active job sites.
Step 1: Assess Wind Conditions Before Launch
Never trust a single weather app reading. Construction sites distort ground-level wind data because structures create variable shear layers at different altitudes.
Pre-Flight Wind Protocol
- Check wind speed at ground level using a handheld anemometer
- Compare with readings at 30 feet and 80 feet using your first scouting flight
- Identify wind direction relative to crane positions and tall structures
- Note any thermal sources (freshly poured concrete, heavy machinery exhaust, dark roofing materials)
- Set a hard abort threshold: for the Mini 5 Pro, this is sustained winds above 24 mph or gusts exceeding 31 mph
The Mini 5 Pro's Level 5 wind resistance rating handles sustained winds up to approximately 24 mph. But rated specs and real-world construction environments are different animals. Turbulence near structures can amplify effective wind load by 30–40% compared to open-field conditions.
Expert Insight: The optimal flight altitude for windy construction deliveries is between 80–100 feet AGL. Below 60 feet, you encounter the most chaotic turbulence created by ground structures. Above 120 feet, you hit stronger laminar winds that push the Mini 5 Pro's lightweight frame off course. The 80–100 foot sweet spot offers the best balance of manageable wind, clear line-of-sight, and safe clearance above most mid-rise construction activity.
Step 2: Configure Obstacle Avoidance for Structural Complexity
Active construction sites are obstacle avoidance nightmares. Unlike a forest or urban streetscape, the obstacles are irregular, partially built, and constantly changing. A wall that existed yesterday might have scaffolding today. A clear flight corridor last week now has a tower crane swing arm cutting through it.
Recommended Obstacle Avoidance Settings
- Set obstacle avoidance to "Bypass" mode rather than "Brake" mode—this allows the drone to reroute rather than simply stopping mid-delivery
- Adjust the detection sensitivity to maximum for all directional sensors
- Enable APAS 5.0 (or the equivalent advanced pilot assistance system) to allow real-time 3D path recalculation
- Manually mark known hazards on your flight map: crane cables, suspended loads, and guy-wires that sensors may not detect
Thin obstacles—especially wire cables and guy-lines—remain the Achilles' heel of every consumer drone sensor suite. The Mini 5 Pro's multi-directional sensing handles solid structures well, but wires under 2mm diameter can slip through undetected.
Critical Rule
Always conduct a visual scan of the flight path for cables before engaging any autonomous mode. No sensor system replaces human eyes on a construction site.
Step 3: Use ActiveTrack and Subject Tracking Strategically
ActiveTrack transforms the Mini 5 Pro from a point-to-point delivery tool into an intelligent site documentation platform. On construction sites, you can lock tracking onto specific subjects—a vehicle transporting materials, a crew working on a particular floor, or even a safety inspector walking the perimeter.
When to Use ActiveTrack on Construction Sites
- Progress documentation: Track a foreman walking a completed section to create natural, cinematic site update videos
- Equipment monitoring: Follow heavy machinery movement patterns to identify efficiency bottlenecks
- Safety audits: Track personnel to verify PPE compliance and safe zone adherence from an aerial perspective
When NOT to Use ActiveTrack
- Near active crane operations with swinging loads
- In areas with multiple crossing flight obstacles
- During gusty wind conditions exceeding 18 mph at flight altitude—the tracking corrections compete with wind compensation, creating erratic flight behavior
Pro Tip: When using subject tracking near structures, switch to Spotlight mode instead of full ActiveTrack. Spotlight keeps the camera locked on the subject while giving you complete manual control over the drone's flight path. This prevents the drone from autonomously navigating toward a tracked subject and colliding with an unseen scaffold pipe or rebar stack.
Step 4: Plan Repeatable Routes with Hyperlapse and Waypoints
Construction delivery isn't a one-time event. You return to the same site daily, weekly, or across project phases. The Mini 5 Pro's Hyperlapse and waypoint features let you automate these routes for consistency and efficiency.
Setting Up Automated Delivery Routes
- Fly the route manually first, marking GPS waypoints at every turn, altitude change, and delivery point
- Save the route as a mission template
- Set altitude buffers of at least 15 feet above any known structure height along the route
- Program speed at no more than 60% of max speed—wind gusts require the drone to have thrust headroom for corrections
- Use Hyperlapse mode on documentation runs to create time-compressed progress footage that clients and project managers value
Route Adaptation Protocol
Update your waypoint routes every 3–5 days on active construction sites. Structures grow, cranes reposition, and temporary obstacles appear without warning. A route that was clear on Monday may have a concrete pump boom parked directly in the flight path by Thursday.
Step 5: Optimize Camera Settings for Site Documentation
Delivering the Mini 5 Pro to construction sites isn't just about moving the drone from point A to point B. The footage you capture during transit and on-site holds enormous value for project stakeholders.
Recommended Camera Configuration
- D-Log color profile: Preserves maximum dynamic range in high-contrast construction environments where bright sky meets dark steel and shadowed interiors
- QuickShots Dronie and Circle modes: Generate automatic reveal shots of completed sections without requiring a dedicated camera operator
- 4K at 30fps: Balances file size with enough resolution for clients to zoom into structural details during review
- Shutter speed: Use the twice-the-frame-rate rule (1/60 for 30fps) with an ND filter to prevent overexposure on bright concrete and steel surfaces
Technical Comparison: Wind Flight Settings
| Parameter | Calm Conditions (<10 mph) | Moderate Wind (10–18 mph) | High Wind (18–24 mph) |
|---|---|---|---|
| Flight Altitude | 40–150 ft | 60–120 ft | 80–100 ft |
| Max Speed Setting | 100% | 75% | 50–60% |
| Obstacle Avoidance Mode | Bypass | Bypass | Brake + Manual Override |
| ActiveTrack Usability | Full | Limited near structures | Not recommended |
| Recommended Flight Time | Full battery (34 min) | 25 min max | 18 min max |
| Return-to-Home Battery Threshold | 20% | 30% | 40% |
| Gimbal Stabilization Load | Low | Moderate | High—reduce speed further |
Common Mistakes to Avoid
1. Ignoring Micro-Turbulence Zones
Flying directly alongside a building face creates a venturi effect that accelerates wind speed by up to 50%. Always approach structures at a 45-degree angle rather than flying parallel to flat surfaces.
2. Launching from Unstable Surfaces
Construction sites are full of vibrating platforms, uneven gravel, and metal decking. Use a portable landing pad on solid ground away from active machinery. A bad takeoff is the fastest path to a damaged gimbal.
3. Trusting Battery Estimates in Wind
The Mini 5 Pro's 34-minute flight time assumes calm conditions. Wind can slash effective flight time by 30–45%. Always plan missions based on worst-case battery consumption, and carry at least 3 fully charged batteries per site visit.
4. Skipping the Compass Calibration
Construction sites are saturated with rebar, steel beams, and heavy equipment—all of which generate magnetic interference. Calibrate the compass at every new launch point, not just once per site. Electromagnetic anomalies shift as steel is added to structures.
5. Flying During Active Crane Lifts
Even with perfect obstacle avoidance, a 249-gram drone caught in the downdraft of a passing suspended load can be thrown into an unrecoverable descent. Coordinate with site supervisors and pause flights during overhead crane operations.
Frequently Asked Questions
Can the Mini 5 Pro reliably operate on construction sites with sustained winds above 20 mph?
Yes, but with significant limitations. The drone's Level 5 wind resistance rating technically covers sustained winds up to 24 mph. However, construction site turbulence amplifies effective wind forces. At 20+ mph sustained wind, expect reduced battery life (approximately 18–20 minutes of usable flight time), increased gimbal strain, and degraded footage stability. Limit missions to essential deliveries only, fly at 80–100 feet AGL, and set your return-to-home battery threshold to 40%.
How do I prevent the Mini 5 Pro from colliding with crane cables that sensors can't detect?
Multi-directional obstacle avoidance sensors on the Mini 5 Pro detect solid objects reliably but struggle with thin cables under 2mm diameter. The solution is procedural, not technological. Before each flight, conduct a visual survey of all cable positions. Mark them on your flight planning app. Establish horizontal exclusion zones of at least 20 feet around any known cable. Communicate with crane operators via radio to know when cables are under tension versus slack, as slack cables sway unpredictably.
What's the best QuickShots mode for construction progress documentation?
Circle mode delivers the highest-value footage for construction stakeholders. Set the point of interest at the center of the active work zone, configure a radius of 80–120 feet, and let the Mini 5 Pro execute a full 360-degree orbit. This produces a comprehensive aerial view that shows progress from every angle in a single automated shot. Run the same Circle route weekly to create a compelling time-series that project managers can use in client reports. Combine this with D-Log for maximum post-production flexibility.
Ready for your own Mini 5 Pro? Contact our team for expert consultation.