Mini 5 Pro Wildlife Guide: High Altitude Mastery
Mini 5 Pro Wildlife Guide: High Altitude Mastery
META: Learn how to capture stunning wildlife footage at high altitude with the Mini 5 Pro. Expert tutorial covers settings, tracking, and pro techniques for creators.
By Chris Park, Creator
TL;DR
- The Mini 5 Pro's sub-249g design and advanced Subject Tracking make it the ideal drone for high-altitude wildlife footage where heavier aircraft struggle with thin air and regulations.
- D-Log color profile preserves up to 2 extra stops of dynamic range, critical for harsh alpine lighting conditions.
- ActiveTrack and obstacle avoidance work together to autonomously follow fast-moving animals through complex terrain.
- QuickShots and Hyperlapse modes let solo creators produce cinematic sequences without a dedicated camera operator.
Why High-Altitude Wildlife Demands a Different Approach
Filming wildlife above 3,000 meters punishes every weakness a drone has. Thin air reduces propeller efficiency by 10–15%, batteries drain faster in cold temperatures, and unpredictable mountain winds can send a heavy aircraft tumbling into a ravine. Most mid-range drones simply aren't built for this environment.
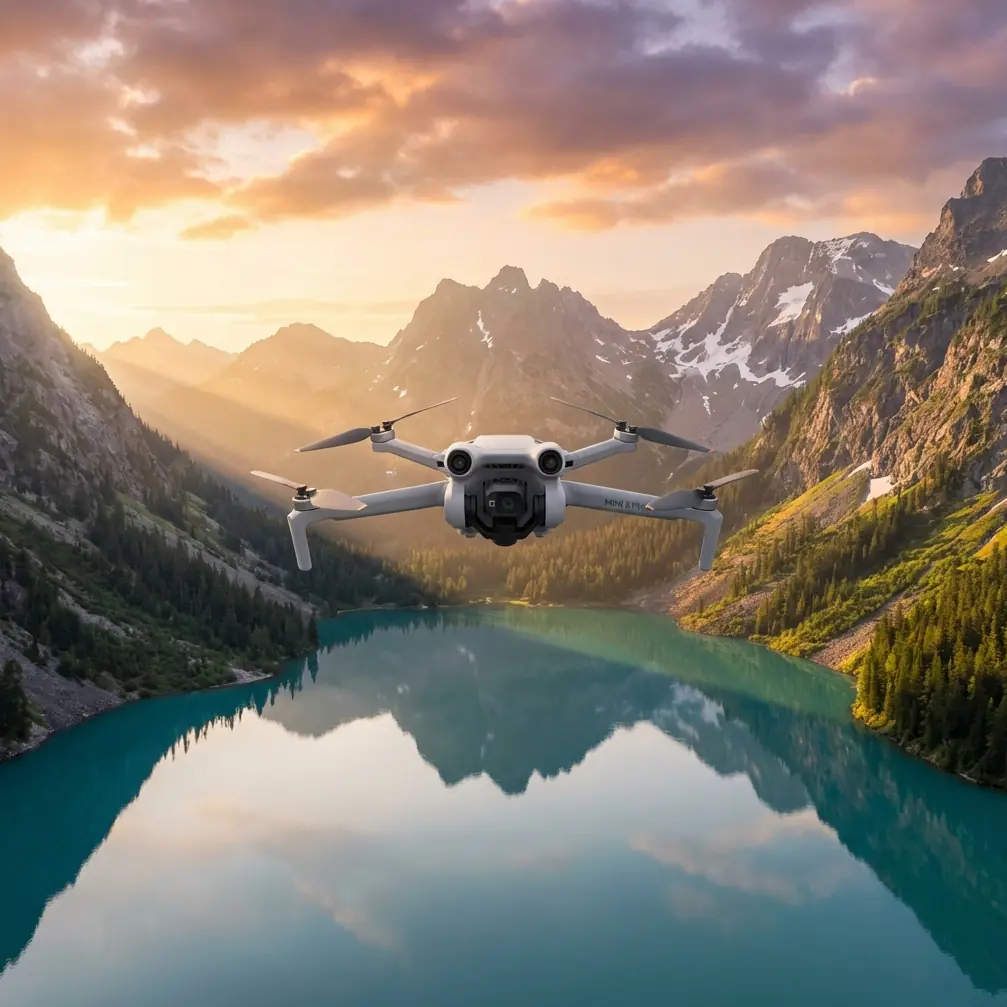
The Mini 5 Pro changes the equation. At just 248 grams, it stays under the registration threshold in most countries while delivering a sensor and intelligent flight system that rival drones twice its weight. This tutorial breaks down exactly how to configure, fly, and shoot with the Mini 5 Pro to capture professional-grade wildlife footage in alpine and high-altitude environments.
Where competitors like the Air 3 and Autel Evo Lite+ tip the scales at 720g and 835g respectively, the Mini 5 Pro's ultralight frame means each propeller works less to maintain hover—a decisive advantage when every gram costs you stability and flight time at altitude.
Step 1: Pre-Flight Configuration for Altitude
Battery and Power Management
Cold temperatures at altitude can reduce lithium-polymer battery capacity by 20–30%. Before every flight:
- Keep batteries in an insulated pouch close to your body until launch
- Pre-warm batteries using the DJI Fly app's self-heating function if available
- Set your low battery warning to 30% instead of the default 20%
- Plan flights in 8–12 minute windows rather than pushing maximum endurance
- Carry at least 3 fully charged batteries per session
Obstacle Avoidance Settings
The Mini 5 Pro's multi-directional obstacle avoidance sensors are your safety net in terrain-heavy environments. For wildlife work at altitude, configure them strategically:
- Set obstacle avoidance to "Bypass" mode rather than "Brake" so the drone routes around trees, rock faces, and cliff edges without stopping mid-shot
- Increase the detection range to maximum sensitivity when flying near cliff faces
- Disable obstacle avoidance on the bottom sensor only if you're launching from a narrow ledge where ground clutter triggers false readings
Pro Tip: In bypass mode, the Mini 5 Pro's obstacle avoidance system recalculates its path in real time. This is critical when tracking an eagle or mountain goat that changes direction near a rock wall—the drone adjusts its route without losing the subject or crashing.
Step 2: Camera Settings for Alpine Wildlife
Choosing the Right Color Profile
High-altitude light is uniquely harsh. UV intensity increases roughly 10–12% per 1,000 meters of elevation, creating blown-out highlights and deep shadows that destroy footage in standard color modes.
Switch to D-Log immediately. This flat color profile captures the widest dynamic range the Mini 5 Pro's sensor offers, preserving detail in both the bright snowfields and shadowed valleys of a single frame. You'll color grade in post, but the raw information D-Log retains is irreplaceable.
Recommended Camera Parameters
- Resolution: 4K at 30fps for maximum detail; switch to 4K/60fps only for fast-moving birds in flight
- Shutter Speed: Follow the 180-degree rule—double your frame rate (1/60 for 30fps, 1/120 for 60fps)
- ISO: Keep at 100–400 to minimize noise; the Mini 5 Pro's sensor handles low ISO beautifully but introduces grain above 800
- ND Filters: Pack an ND8, ND16, and ND32 set—snow and high-altitude sun will demand them
- White Balance: Set manually to 5500K–6500K to avoid auto white balance shifts when the drone pans between snow and forest
Expert Insight: Many creators skip ND filters on lightweight drones, assuming the small sensor can handle exposure adjustments digitally. At altitude, this is a critical error. Without an ND16 over fresh snow, you'll be forced to stop down or increase shutter speed beyond the 180-degree rule, resulting in either soft footage or unnatural, jittery motion. Physical filtration is non-negotiable.
Step 3: Intelligent Flight Modes for Wildlife Tracking
This is where the Mini 5 Pro genuinely outclasses its competition. The combination of ActiveTrack and the drone's lightweight agility creates a tracking platform that heavier drones can't replicate in thin mountain air.
ActiveTrack for Moving Subjects
ActiveTrack locks onto a subject—a herd of ibex crossing a ridge, a hawk circling a thermal—and follows autonomously. To use it effectively for wildlife:
- Draw a box around your subject on the controller screen to initiate tracking
- Select "Trace" mode for animals moving laterally across the landscape
- Choose "Profile" mode to maintain a fixed side angle on animals moving along predictable paths like game trails
- Keep the drone at least 30–50 meters from the subject to avoid spooking wildlife with rotor noise
QuickShots for Cinematic Reveals
QuickShots automate complex camera movements that would require a two-person crew to execute manually:
- Dronie: Pulls back and up from the subject—perfect for revealing a lone wolf against a vast alpine panorama
- Helix: Spirals upward around the subject, creating dramatic reveals of nesting sites on cliff faces
- Rocket: Ascends directly upward—use this when an animal is stationary at a watering hole to reveal the surrounding terrain
- Circle: Orbits the subject at a fixed radius and altitude, ideal for herds or groups of animals
Hyperlapse for Environmental Context
A 4–6 second Hyperlapse of clouds rolling across a mountain range or shadows moving across a valley provides essential B-roll that contextualizes your wildlife footage. Set the interval to 2–3 seconds between frames and run the sequence for at least 5 minutes of real time.
Technical Comparison: High-Altitude Wildlife Drones
| Feature | Mini 5 Pro | Air 3 | Autel Evo Lite+ |
|---|---|---|---|
| Weight | 248g | 720g | 835g |
| Registration Required (<250g zones) | No | Yes | Yes |
| Obstacle Avoidance | Multi-directional | Multi-directional | Multi-directional |
| ActiveTrack | Yes (latest gen) | Yes | Yes (limited) |
| D-Log / Flat Profile | Yes | Yes | Yes |
| Max Altitude (above takeoff) | 4,000m | 5,000m | 4,000m |
| Wind Resistance | Level 5 | Level 5 | Level 5 |
| Battery Life (sea level) | ~34 min | ~46 min | ~40 min |
| QuickShots | Full suite | Full suite | Limited |
| Effective Altitude Performance | Excellent (lightweight) | Moderate (heavier) | Moderate (heaviest) |
The Mini 5 Pro trades raw flight time for a weight advantage that becomes increasingly valuable as altitude rises. At 4,000 meters, a 248g drone retains proportionally more of its thrust margin than a 720g or 835g competitor—meaning more responsive controls, better wind handling relative to mass, and safer operation near terrain.
Common Mistakes to Avoid
1. Flying Too Close to Wildlife
Rotor noise carries far in thin mountain air. Maintain 50+ meters of distance from sensitive species. Use the Mini 5 Pro's digital zoom to tighten your frame in post rather than risking a disturbance that ruins the shot and stresses the animal.
2. Ignoring Wind Patterns at Altitude
Mountain winds accelerate through passes and over ridgelines. Check the DJI Fly app's wind speed indicator constantly. If sustained winds exceed 30 km/h, ground the drone—no shot is worth a loss.
3. Shooting Everything in Auto Exposure
Auto exposure shifts constantly when the frame includes both snow and dark terrain. Lock your exposure manually on a midtone in the scene, and let D-Log handle the rest.
4. Neglecting Propeller Condition
At altitude, every percentage of propeller efficiency matters. Replace propellers that show any nicks, warping, or wear. Carry at least two spare sets.
5. Skipping Compass Calibration
High-altitude locations with mineral-rich rock can throw off magnetometer readings. Calibrate the compass at every new launch site, even if you flew from a nearby location earlier the same day.
Frequently Asked Questions
Can the Mini 5 Pro handle snow and light rain at high altitude?
The Mini 5 Pro is not officially rated for wet conditions. Light snowfall may not cause immediate damage, but moisture on the motors and electronics creates cumulative risk. If snow begins falling, land within 2 minutes and dry the drone thoroughly. Carry silica gel packets in your transport case as a precaution.
How does Subject Tracking perform with small or camouflaged animals?
ActiveTrack relies on visual contrast to maintain a lock. Animals with strong color contrast against their background—a dark chamois on snow, for example—track reliably at distances up to 80 meters. Camouflaged subjects in cluttered environments like dense scrub may require you to re-draw the tracking box periodically. Shooting in good light dramatically improves tracking consistency.
Is D-Log worth the extra post-production time for wildlife content?
Absolutely. High-altitude environments produce the most extreme dynamic range scenarios you'll encounter—blinding snow next to deep forest shadows, direct sun against shaded cliff faces. D-Log captures up to 2 additional stops of highlight and shadow detail compared to standard profiles. For professional or portfolio-quality wildlife work, the 30–45 minutes of color grading per clip pays for itself in footage you'd otherwise lose to blown highlights.
Final Thoughts: Preparation Wins at Altitude
High-altitude wildlife filming is 90% preparation and 10% flying. The Mini 5 Pro gives you a technological edge—lightweight design, intelligent tracking, cinematic color science—but that edge only materializes if you've configured your settings, managed your batteries, and scouted your location before the animal appears.
Every flight at altitude should have a plan: know your subject's likely behavior, pre-set your camera parameters, and rehearse your QuickShot or ActiveTrack sequence on a stationary object before the real opportunity arrives. The creators who come home with extraordinary footage aren't luckier—they're more prepared.
Ready for your own Mini 5 Pro? Contact our team for expert consultation.