How I Capture Highways in Complex Terrain with the Mini 5 Pr
How I Capture Highways in Complex Terrain with the Mini 5 Pro
META: A field-tested Mini 5 Pro workflow for filming highways in mountains and broken terrain, with practical advice on obstacle avoidance, ActiveTrack, D-Log, Hyperlapse, and handling electromagnetic interference.
Highway footage looks simple until you try to shoot it properly.
A road is a moving line. In flat country, that line behaves. In complex terrain, it disappears behind cut slopes, slips into tree cover, bends around ridges, crosses bridges, and throws your signal environment into chaos. Add moving vehicles, changing elevation, and the electromagnetic clutter that often comes with roadside infrastructure, and the job stops being cinematic daydreaming and turns into real fieldcraft.
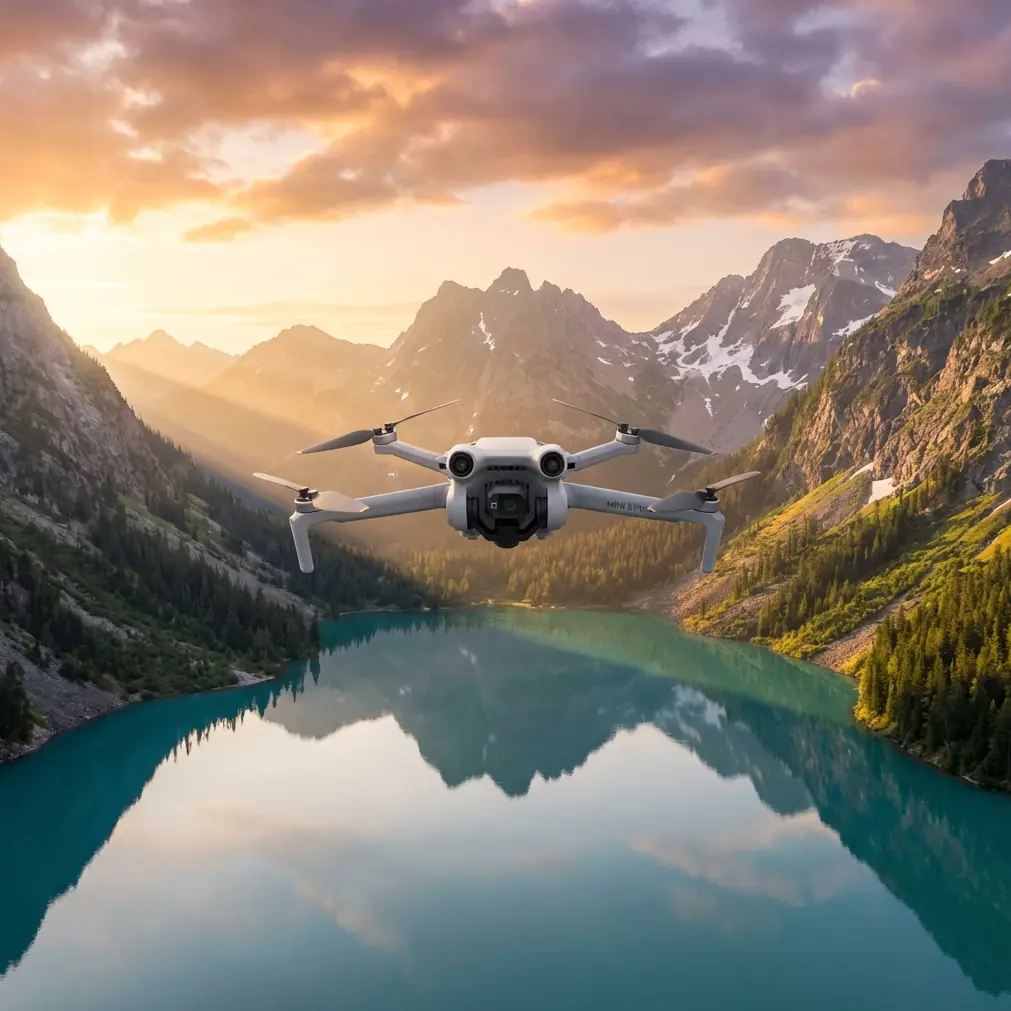
That is exactly where I like the Mini 5 Pro.
I shoot as a photographer first, not as someone chasing flashy drone tricks. My priority is clean structure in the frame: the road as geometry, traffic as rhythm, terrain as context. When I work over highways in hilly or mountainous areas, I need a small aircraft that can move precisely, read its surroundings well, and let me adapt quickly when the environment gets messy. The Mini 5 Pro fits that style because it supports the features that matter most for this kind of work: obstacle avoidance, subject tracking, QuickShots, Hyperlapse, D-Log, and ActiveTrack.
This article is my real-world approach to capturing highways in complex terrain with the Mini 5 Pro, including one problem that rarely gets enough honest discussion: electromagnetic interference and how a simple antenna adjustment can save a flight.
Why highways in complex terrain are different
A highway through flat farmland gives you easy lines and predictable airspace behavior. A highway through mountain cuts or layered hills is another story.
You are often dealing with:
- abrupt elevation changes
- narrow visual corridors
- retaining walls, sign gantries, and power lines
- mixed light from open sky and shadowed slopes
- radio noise from roadside systems and dense infrastructure
- vehicles that vanish and reappear behind terrain
That means your flight plan cannot rely on one technique. You need a toolkit.
I usually break a highway shoot into four visual goals:
Establish the route
Show where the road sits in the land.Reveal traffic flow
Use movement to give scale and tempo.Show terrain pressure
Let viewers feel how the road negotiates ridges, valleys, or cut sections.Maintain signal and safety discipline
The shot is worthless if control quality degrades at the wrong moment.
The last point is where many operators get humbled.
Start with a route study, not a launch
Before the Mini 5 Pro ever leaves the ground, I study the road like a topographic subject, not just a transportation subject.
I look for:
- S-curves
- bridge transitions
- elevation crests
- cut-and-fill sections
- merge points
- open pull-off areas that provide clean takeoff and recovery space
Then I identify where the signal environment may become unstable. Highways can carry more than traffic. They often concentrate utility corridors, communications infrastructure, and metallic structures that complicate transmission quality. If the route passes close to towers, elevated signage, or heavily built roadside zones, I mark those areas as likely interference points.
This matters because a great tracking shot can fall apart not from pilot error, but from degraded link quality at the exact moment the road drops into a bend.
Aviation development in China offers a useful reminder about why redundancy and system thinking matter. Recent CAAC reporting on the Honghu Mark1 eVTOL described an airworthiness-grade triple-redundant flight control system and noted that the aircraft had already completed hundreds of full-tilt flight tests as part of an accelerated certification phase. That is not directly about a Mini 5 Pro, of course. But the operational lesson absolutely carries over: serious aerial work depends on layered reliability, repeated testing, and disciplined communication between system behavior and operator response. When I plan a highway shoot, I borrow that mindset. I do not assume one perfect pass. I build margin into the operation.
The first pass: establish structure with a high oblique angle
My opening shot is rarely dramatic. It is functional.
I fly a high oblique angle to show the highway’s relationship to the terrain. This gives me a map-like establishing frame without going fully top-down. In complex terrain, this angle often reveals the best visual story: a road hugging a slope, crossing a ravine, or threading through cut hills.
Here’s what I want from that first pass:
- a stable horizon
- enough altitude to read the terrain clearly
- moderate forward motion
- no aggressive yaw inputs
This is where obstacle avoidance earns its keep. In uneven terrain, your visual attention is split between composition, road behavior, and aircraft positioning. Obstacle sensing reduces workload when the slope geometry becomes deceptive. It is not a substitute for judgment, but it is a valuable layer.
If I’m planning a final grade, I often shoot this pass in D-Log. Highways in mountain terrain can shift from bright reflective pavement to deep shadow in a single move. D-Log gives me more flexibility to recover detail and keep the final sequence cohesive. Without that latitude, the road surface may clip while the surrounding terrain collapses into muddy shadow.
ActiveTrack is useful, but only if you define the subject correctly
A lot of pilots approach subject tracking on highways the wrong way. They lock onto a vehicle and call it a day.
Sometimes that works. Often it weakens the story.
If the point is traffic energy, tracking a lead truck or a distinct vehicle can be effective. But if the point is the road’s interaction with terrain, it is usually better to think of the subject as the flow corridor, not a single car. In practice, that means using ActiveTrack selectively and being ready to abandon it when the terrain becomes too complex or when vehicle spacing creates awkward pacing.
I use ActiveTrack in three specific situations:
1. A vehicle entering a dramatic terrain feature
For example, when a truck enters a valley bend or bridge section. The tracked subject gives the viewer an anchor while the landscape does the rest.
2. A convoy pattern or dense traffic rhythm
If multiple vehicles create visual tempo, tracking one can maintain continuity while the rest of the flow fills the frame.
3. A reveal move out of obstruction
When the road emerges from trees or a cut slope, tracking can help hold the motion cleanly through the reveal.
What I avoid is overcommitting to automation in tight geometry. If terrain or roadside structures start compressing the flight corridor, I switch back to manual control. Complex highway shooting rewards pilots who know when to stop asking software to solve an aesthetic problem.
How I deal with electromagnetic interference in the field
This is the problem I promised to address honestly.
When filming highways, especially near major infrastructure, you may encounter electromagnetic interference that affects signal stability. The first sign is often subtle: image breakup, control hesitation, or transmission warnings that seem inconsistent with your line of sight.
My response is simple and immediate.
Step 1: Do not chase the shot deeper
If the signal quality starts dropping, I do not push forward hoping it will clear. That is how small problems become large ones.
Step 2: Pause and reorient
I slow down or hold position if conditions allow. Then I reassess the relationship between the aircraft and controller.
Step 3: Adjust the antenna direction properly
This is the part many newer operators get wrong. They point the antenna tips at the drone. That is usually not the strongest orientation. I adjust the controller antenna faces so they are aligned toward the aircraft’s position more effectively, then I rotate my body if needed to keep a cleaner link path.
Step 4: Change my standing position if the terrain is shielding me
A few steps can matter. If I am standing low relative to the road corridor, a guardrail, embankment, parked vehicle, or slope edge may be contributing to signal issues. I move to a slightly clearer position while maintaining operational safety.
Step 5: Gain altitude carefully if appropriate
Sometimes a modest increase in altitude improves the link by reducing terrain masking. Not always, but often enough that it is worth considering.
In complex highway environments, antenna adjustment is not a trivial habit. It is part of the workflow. I have recovered perfectly usable links just by reorienting the controller properly and shifting to a cleaner line. If you want a direct way to compare field notes with my setup habits, I sometimes share them here: message me on WhatsApp.
Best shot types for highways with the Mini 5 Pro
The Mini 5 Pro gives you enough flexibility to build a sequence rather than a single hero shot. These are the patterns I use most.
1. The climbing lead shot
Start lower and behind the traffic flow, then climb gently as the road rises into terrain. This emphasizes grade change and gives the viewer a sense of ascent.
Why it works:
- reveals topography gradually
- keeps motion natural
- helps separate the highway from surrounding terrain layers
Watch for:
- overclimbing too early
- losing the visual relationship between vehicles and road
2. The lateral compression shot
Fly offset from the road and move parallel to it. This is excellent when the highway snakes along a hillside or through repeated bends.
Why it works:
- shows traffic rhythm
- highlights the road’s engineered path
- creates strong parallax with trees, slopes, and barriers
Watch for:
- side obstacles
- misleading depth in uneven terrain
Obstacle avoidance is especially helpful here, but I still keep a conservative path because roadside geometry can become visually confusing at speed.
3. The top-down geometry pass
A brief overhead section can reset the viewer’s spatial understanding. I use it for interchanges, lane splits, or bridges where the road pattern itself becomes the image.
Why it works:
- graphic clarity
- excellent for edit transitions
- useful for mapping-like context in storytelling
Watch for:
- flat light that kills texture
- vehicles becoming too small unless traffic density supports the shot
4. The Hyperlapse terrain reveal
If clouds are moving or traffic is steady, Hyperlapse can transform a routine road segment into something more analytical and cinematic at once. I like using it when a highway passes through a valley opening or long elevated section.
Why it works:
- condenses repetitive motion into readable flow
- emphasizes landscape scale
- turns traffic into a visual pulse
Watch for:
- wind instability
- inconsistent framing over long captures
Hyperlapse is less forgiving than people think. Get the composition locked before you commit.
5. QuickShots for compact sequences
I do not build full highway projects around QuickShots, but they are useful for short inserts when I need variety fast. A controlled reveal from a turnout, overpass edge, or open roadside launch spot can add structure to the edit without requiring a complex manual move.
The key is restraint. QuickShots are accents, not the whole language.
Color and exposure choices that save the edit
Highways create nasty contrast problems. Asphalt can reflect harsh highlights, vehicle roofs can flash, and adjacent vegetation may swing from luminous to blocked-up depending on the sun angle.
That is why I keep coming back to D-Log for serious work.
With D-Log, I can:
- preserve cloud and sky detail
- keep shadow texture in cut slopes
- match multiple passes more cleanly
- avoid a brittle, overprocessed look
I also prefer to shoot during times when the road has directional light rather than overhead glare. Early or later sun gives the pavement shape and helps barriers, shoulders, and terrain contours separate visually.
If your footage looks flat, the issue is not always the drone. Sometimes it is the hour you chose.
A practical workflow for a safe, strong highway sequence
If I had to compress the whole process into one repeatable workflow, it would look like this:
- scout topography and launch points
- identify likely interference zones
- open with a high oblique establishing shot
- capture one or two manual parallel passes
- use ActiveTrack only where the terrain supports it
- shoot at least one D-Log pass for grading flexibility
- add a Hyperlapse or QuickShot for pacing
- monitor link quality constantly and adjust antenna orientation early, not late
That last point deserves repeating. In difficult terrain, signal management is part of image-making. Treat it that way.
The broader aviation world is moving in the same direction: more structured testing, more system transparency, more emphasis on dependable control architecture. The Honghu Mark1 certification familiarization meeting highlighted not just progress, but process—design assurance, communication planning, and core control technologies. Even though that aircraft sits in a completely different category, the underlying discipline is familiar to any serious drone operator. Good aerial work is never just about what the camera sees. It is about how reliably the aircraft and operator work together under real conditions.
For Mini 5 Pro pilots filming highways, that translates into a simple truth. The best footage usually comes from the pilot who reads terrain well, respects signal behavior, and knows when to let the road tell the story.
Ready for your own Mini 5 Pro? Contact our team for expert consultation.