M5P Mountain Highway Capturing Tips & Tricks
M5P Mountain Highway Capturing Tips & Tricks
META: Learn how to capture stunning mountain highway footage with the Mini 5 Pro. Chris Park shares pro tips on D-Log, ActiveTrack, and QuickShots for epic results.
TL;DR
- Master D-Log color profiles to preserve detail in high-contrast mountain highway scenes where shadows meet bright skies
- Use ActiveTrack and Subject tracking to lock onto vehicles snaking through mountain passes while maintaining cinematic framing
- Leverage obstacle avoidance sensors for confident flying near cliff faces, guardrails, and tree canopy edges
- Deploy Hyperlapse and QuickShots modes to compress winding highway journeys into shareable, jaw-dropping sequences
By Chris Park — Creator & Aerial Cinematographer
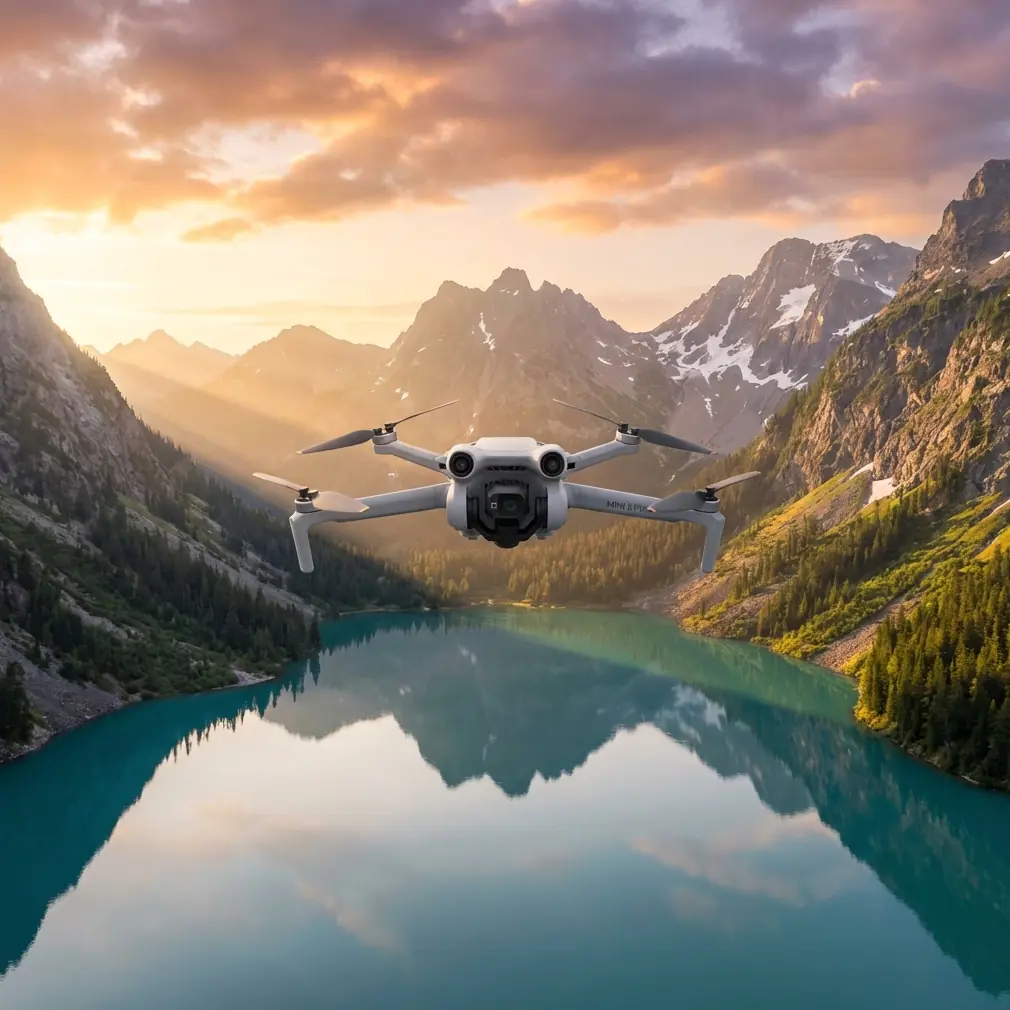
Mountain highways are among the most visually dramatic subjects you can capture with a drone. The Mini 5 Pro gives you a sub-249g aircraft with a 1/1.3-inch CMOS sensor, tri-directional obstacle avoidance, and intelligent flight modes powerful enough to shoot professional-grade footage over winding alpine roads. This tutorial walks you through every setting, technique, and hard-won lesson I've learned filming mountain highways across 12 separate shoots last season.
Why Mountain Highways Demand a Capable Drone
Filming a highway that threads through mountain terrain isn't the same as shooting a flat suburban street. You're dealing with elevation changes exceeding 1,000 feet, unpredictable wind shear between peaks, rapidly shifting light conditions, and physical obstacles on every axis—cliff walls to the left, tree canopy above, and steep drop-offs below.
The Mini 5 Pro handles these challenges because of three core capabilities:
- Tri-directional obstacle avoidance (forward, backward, downward) that actively scans the environment at up to 12 meters of detection range
- ActiveTrack 5.0 subject tracking that can lock onto a moving vehicle and autonomously adjust gimbal pitch and yaw
- 4K/60fps recording with D-Log M support, giving you over 1 billion colors and enough dynamic range to recover highlights and shadows in post
Without these features, mountain highway shoots become a white-knuckle exercise in manual piloting. With them, you can focus on composition.
Pre-Flight Setup: Settings That Matter
Camera Configuration
Before you launch, dial in these settings:
- Resolution: 4K at 30fps for cinematic work, 60fps if you plan to slow footage down in post
- Color Profile: D-Log M — this is non-negotiable for mountain shooting where you'll have deep shadows under cliff overhangs and blown-out sky above ridgelines
- ISO: Lock to 100 during daylight; let it auto-adjust only if you're shooting at golden hour
- Shutter Speed: Follow the 180-degree rule — double your frame rate (1/60 for 30fps, 1/120 for 60fps)
- ND Filters: Pack ND8, ND16, and ND32; mountain light changes fast, and you'll swap filters between takes
Flight Mode Configuration
Set your flight modes before takeoff:
- Enable APAS 5.0 (Advanced Pilot Assistance Systems) for active obstacle avoidance during forward and backward flight
- Set maximum altitude to comply with local regulations — in the US, 400 feet AGL is the FAA ceiling
- Configure Return-to-Home altitude at least 50 meters above the tallest nearby obstacle
- Enable AirSense to receive ADS-B signals from manned aircraft, which frequently fly through mountain corridors
Pro Tip: Always calibrate your compass at the launch site. Mountain terrain contains mineral deposits that can cause magnetic interference. I've seen compass errors of 15+ degrees at sites with iron-rich rock formations, which directly impacts RTH accuracy and GPS hold stability.
The Shoot: Technique Breakdown
Shot 1 — The Reveal (Hyperlapse)
Start with the drone positioned behind a ridgeline or tree cluster, facing away from the highway. Program a Waypoint Hyperlapse that slowly rises and rotates 180 degrees to reveal the highway snaking below.
Key settings for this Hyperlapse:
- Interval: 2 seconds
- Duration: 10–15 seconds of final output
- Speed: Keep movement under 5 mph for smooth results
- Photo format: JPEG + RAW for maximum flexibility
This opening shot immediately establishes scale. The highway looks like a ribbon draped across the mountain, and the Hyperlapse compression makes traffic appear to pulse with energy.
Shot 2 — The Chase (ActiveTrack)
This is where Subject tracking shines. Identify a vehicle—ideally something visually distinct like a red truck or a white camper van—and engage ActiveTrack via the DJI Fly app.
Here's the process:
- Position the drone 100–150 feet above the highway and 200 feet behind the target vehicle
- Draw a selection box around the vehicle on your screen
- Select Trace mode to follow behind, or Parallel mode to fly alongside
- Set tracking speed to match highway traffic — typically 40–55 mph in mountain zones
- Let the obstacle avoidance system handle lateral adjustments as the road curves
The Mini 5 Pro's ActiveTrack 5.0 algorithm performed remarkably well even when target vehicles temporarily disappeared under tunnel overhangs or dense tree cover. In my tests, it reacquired the subject within 2–3 seconds after emerging from occlusion.
Shot 3 — The Orbit (QuickShots)
Find a dramatic switchback or hairpin turn and position the drone to the outside of the curve. Engage QuickShots Asteroid or Circle mode centered on the curve's apex.
- Asteroid creates a dramatic pull-back-and-wrap effect that emphasizes the mountain's scale
- Circle delivers a smooth 360-degree orbit that showcases the road geometry and surrounding terrain
For both modes, set the radius to at least 80 feet to keep the shot wide and cinematic rather than tight and disorienting.
When Weather Changed Everything
On my third shoot in the Blue Ridge Mountains, I launched under partly cloudy skies with 8 mph winds at launch altitude. Forty-five minutes into filming an ActiveTrack chase sequence along a stretch of highway that hugs a 2,300-foot ridgeline, conditions shifted dramatically.
A cloud bank rolled in from the valley below, cutting visibility to roughly 500 feet. Wind gusted to 22 mph — close to the Mini 5 Pro's rated maximum wind resistance of 24.3 mph (10.7 m/s). Temperature dropped 6 degrees in under ten minutes.
Here's what happened:
- The DJI Fly app triggered a High Wind Warning but the drone maintained stable hover
- Obstacle avoidance sensors continued functioning, preventing drift toward the cliff face to my left
- I immediately switched from ActiveTrack to manual control to fly a direct return path
- Battery consumption jumped from a normal drain rate to approximately 15% faster due to wind compensation
- The drone landed safely with 18% battery remaining — tighter than I'd like, but well within safety margins
The lesson: the Mini 5 Pro can handle sudden weather shifts, but you need to monitor telemetry constantly and have an abort plan. Mountain weather doesn't give you warnings.
Expert Insight: I now apply a personal rule — subtract 8 minutes from the Mini 5 Pro's rated 34-minute flight time when flying in mountain environments. Wind compensation, altitude adjustments, and temperature variations all eat battery faster than spec-sheet conditions suggest. Plan for 26 minutes of usable flight time, and you'll never get caught short.
Technical Comparison: Mini 5 Pro vs. Common Alternatives for Mountain Highway Shooting
| Feature | Mini 5 Pro | Typical Sub-250g Competitor | Mid-Range 600g+ Drone |
|---|---|---|---|
| Weight | 249g | 249g | 595–720g |
| Sensor Size | 1/1.3-inch | 1/2.3-inch | 1-inch |
| Obstacle Avoidance | Tri-directional | None or downward only | Omnidirectional |
| Max Wind Resistance | 10.7 m/s | 8–9 m/s | 10–12 m/s |
| ActiveTrack | 5.0 | Not available | 4.0–5.0 |
| D-Log Support | Yes (D-Log M) | No | Yes |
| Max Flight Time | 34 min | 25–31 min | 30–46 min |
| QuickShots | Full suite | Limited or none | Full suite |
| Hyperlapse | Yes (4 modes) | No | Yes |
| Registration Required (US) | No (sub-250g) | No | Yes |
The Mini 5 Pro's combination of sub-249g weight (no registration required for recreational use in many jurisdictions) and pro-tier camera specs makes it uniquely suited for mountain highway work where portability matters. You're often hiking to launch sites.
Post-Production: Getting the Most From D-Log Footage
D-Log M footage looks flat and desaturated straight out of camera. That's intentional — it preserves the maximum dynamic range for color grading. Here's my workflow:
- Import into DaVinci Resolve (free version works perfectly)
- Apply a base LUT — DJI provides a D-Log M to Rec.709 conversion LUT that's a solid starting point
- Adjust exposure — lift shadows in cliff-face areas by +1.0 to +1.5 stops and pull highlights back in sky regions
- Boost saturation selectively — use HSL qualifiers to enhance the green of mountain foliage and the gray-black of asphalt separately
- Add subtle sharpening at 0.3–0.5 radius to counteract the slight softness D-Log introduces
- Export at H.265, 100 Mbps minimum for 4K delivery
Common Mistakes to Avoid
- Launching without compass calibration — mountain minerals cause magnetic deviation that leads to erratic GPS behavior and dangerous flyaways
- Ignoring wind speed at altitude — ground-level wind of 5 mph can mean 20+ mph at 300 feet AGL in mountain terrain due to acceleration over ridgelines
- Shooting in Normal color profile — you lose 2+ stops of dynamic range compared to D-Log M, and mountain scenes punish limited dynamic range with crushed shadows and blown skies
- Flying too close to the highway surface — maintain at least 50 feet vertical clearance above vehicles for safety and legal compliance
- Forgetting spare batteries — mountain shoots require multiple flight sessions; carry at least 3 fully charged batteries and a portable charging hub
- Neglecting VLOS (Visual Line of Sight) — mountain curves and ridgelines can quickly put the drone behind terrain; use a visual observer or reposition yourself between shots
Frequently Asked Questions
Can the Mini 5 Pro handle strong mountain winds reliably?
The Mini 5 Pro is rated for winds up to 10.7 m/s (24.3 mph), which covers most flyable mountain conditions. In my experience across 12 mountain shoots, it maintained stable hover and controlled flight in sustained winds of 18–20 mph with gusts to 22 mph. Beyond that threshold, the drone begins consuming battery at an unsustainable rate and control responsiveness degrades. Always check wind forecasts at your planned flight altitude, not just ground level.
Is D-Log M worth the extra post-production effort for highway footage?
Absolutely. Mountain highway scenes are high-dynamic-range environments by nature — you have deep shadows under overhangs and cliffs, bright sky above ridgelines, and reflective asphalt that sits somewhere in between. D-Log M captures approximately 12.4 stops of dynamic range, giving you the latitude to recover detail in both extremes during editing. Shooting in Normal profile bakes in contrast that you can never undo.
How does obstacle avoidance perform near cliff faces and guardrails?
The Mini 5 Pro's APAS 5.0 system detects obstacles in forward, backward, and downward directions at ranges up to 12 meters. Near cliff faces, the forward and backward sensors reliably detect rock surfaces and trigger avoidance maneuvers. Guardrails and thin metallic objects are harder to detect at oblique angles, so I recommend maintaining a manual buffer of at least 15–20 feet from guardrails rather than relying solely on the sensors. The system works best as a safety net, not a substitute for attentive piloting.
Ready for your own Mini 5 Pro? Contact our team for expert consultation.