Mini 5 Pro Field Mapping in Complex Terrain
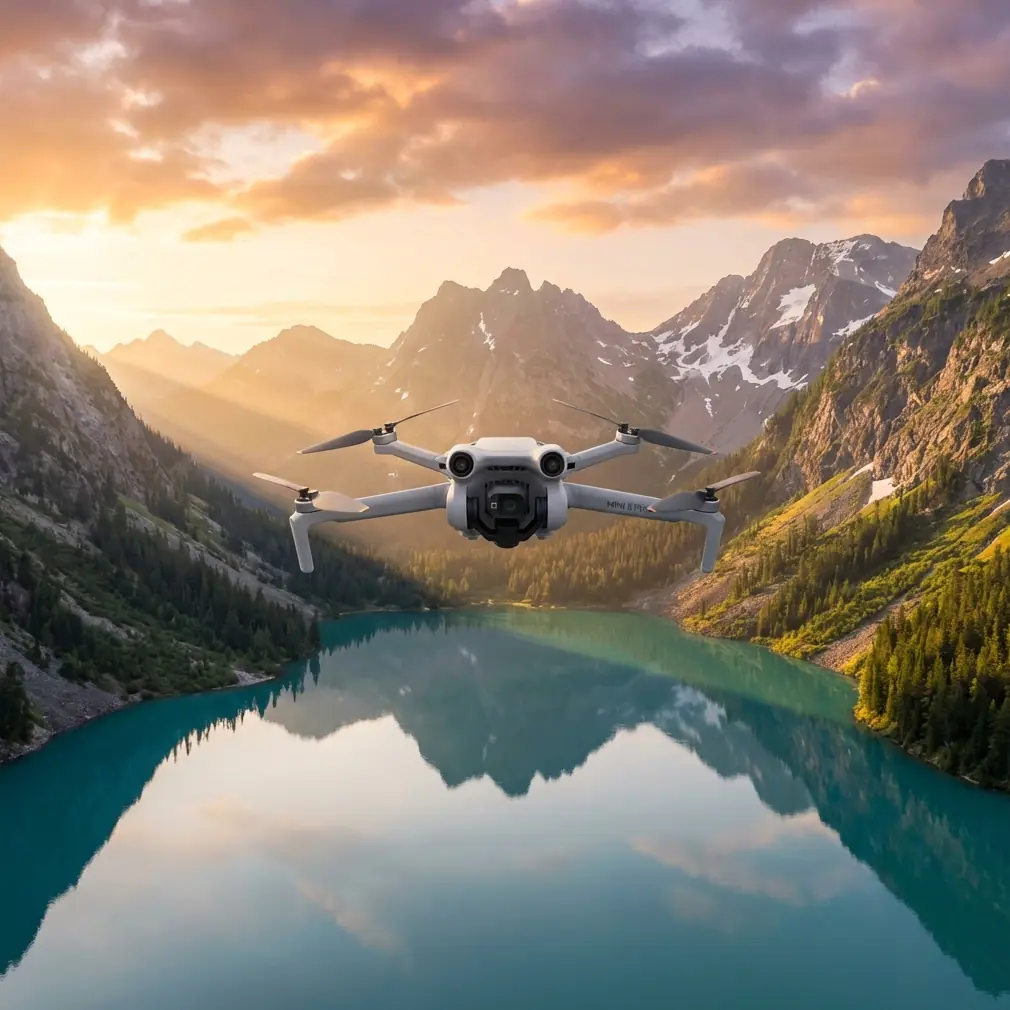
Mini 5 Pro Field Mapping in Complex Terrain: A Practical Capture Workflow That Actually Holds Up
META: Learn how to use the Mini 5 Pro for capturing fields in complex terrain with safer flight planning, smarter battery management, obstacle avoidance, ActiveTrack, QuickShots, Hyperlapse, and D-Log shooting tips.
Capturing fields sounds simple until the land stops behaving like a flat diagram. The moment you work around terraces, tree lines, irrigation ditches, uneven ridges, wind breaks, utility poles, or sloping access roads, the job changes. You are no longer just flying over open ground. You are managing elevation shifts, changing line-of-sight, inconsistent background contrast, and battery drain that rarely matches what the percentage indicator seemed to promise at takeoff.
That is where the Mini 5 Pro becomes interesting.
A compact drone in this class is not just useful because it is easy to carry. It matters because field work often starts with walking. You scout from one edge, climb to a higher point, check wind movement across the crop canopy, and decide whether the safe launch spot is also the best signal position. In complex terrain, mobility is not a convenience. It is part of the capture strategy.
This guide is built for one real scenario: using the Mini 5 Pro to capture fields when the terrain is uneven, obstructed, or visually complicated. Not generic flying advice. Actual workflow.
Start by reading the terrain, not the drone screen
The most common mistake in field capture is over-focusing on settings before understanding the land. A field in rolling terrain can create three separate problems at once:
- the drone appears higher than it really is relative to a rising ridgeline
- obstacle avoidance may react differently as branches, wires, and slope angles enter the flight path
- return distance is not the same as return effort when the wind favors the outbound leg
Before launching, walk enough of the perimeter to answer four questions:
- Where does the terrain rise toward the planned flight path?
- Which edges are visually “clean” for tracking and reveal shots?
- Where do trees or poles create hidden vertical hazards?
- From which point can you maintain the strongest visual awareness through most of the mission?
With the Mini 5 Pro, obstacle avoidance is one of the features that can reduce workload in these situations, but it should never become a substitute for terrain reading. Sensors are helpful. Hillsides, sparse branches, wires, and changing light still demand judgment.
Operationally, this matters because a drone can clear the crop canopy by a comfortable margin and still drift into a hazard as the land rises beneath it. That is a terrain problem, not a pilot reflex problem.
Build the shot list around field geometry
When readers think about “capturing fields,” they often imagine one high orbit and a few wide passes. That can look fine, but it usually tells you very little about the structure of the land. Complex terrain needs a more deliberate sequence.
I typically break the mission into four layers.
1. The orientation pass
This is the simplest clip, but it often becomes the backbone of the whole edit. Fly a slow lateral path across the field at a moderate altitude, keeping movement steady and the horizon disciplined. The goal is not drama. The goal is to reveal slope, access routes, drainage patterns, and the relationship between field sections.
This pass helps in two ways. First, it establishes where terrain compresses visually from the air. Second, it gives you a reference clip for deciding whether later tracking shots are too low, too fast, or too flattering to be useful.
2. The contour reveal
Instead of flying straight over the middle, work along the field’s elevation change. If there is a terrace edge, embankment, or stepped contour, fly obliquely so the viewer sees height separation develop across the frame.
This is where D-Log becomes valuable. In scenes with bright sky, reflective soil, shaded tree lines, and darker crop rows all in one composition, flatter capture gives you more flexibility to recover highlight detail and preserve shadow information later. The practical significance is straightforward: difficult terrain often creates difficult contrast. D-Log gives you more room when the scene exceeds what a standard profile can gracefully hold.
3. The low-structure pass
This is the pass that shows how the field actually behaves. Fly lower along irrigation lines, crop boundaries, drainage cuts, or vehicle tracks. Keep speed controlled. Complex terrain punishes rushed inputs because foreground elements move fast and expose every correction.
If you are using subject tracking or ActiveTrack with a vehicle, tractor, rider, or walker moving through the field, do not let automation choose the whole story. Use it when the subject is visually distinct and the route is free of surprise hazards. In mixed terrain, ActiveTrack is best treated as a precision assistant, not an autopilot identity.
That distinction matters operationally because tracking performance depends heavily on separation, contrast, and route predictability. A subject moving near trees, poles, or terrain breaks can confuse the visual scene quickly. The feature is powerful, but in a field bordered by clutter, manual oversight is what keeps the shot clean and the aircraft safe.
4. The summary shot
This can be a pullback, a rising backward move, or a controlled orbit if space and obstacles allow it. QuickShots can help here when you want a repeatable movement without manually rebuilding the same arc several times.
In open farmland, QuickShots are mostly a convenience. In complex terrain, they can become a consistency tool, especially when you need a clean establishing sequence after several manually flown technical passes. The catch is obvious: only use them when the flight envelope is genuinely clear.
A field battery tip that comes from experience, not the manual
Here is the battery rule I trust in uneven terrain: do not plan your return around the number you see when everything still feels easy.
I start thinking about the return leg earlier than most pilots do, especially when the outbound path benefits from tailwind or slight downhill visual bias. In practical terms, if I hit 60% and I am still exploring options on the far side of the field, I stop experimenting and start consolidating. That number is not universal, but it is a useful decision point because complex terrain creates slow returns. Not always long returns. Slow ones.
Why slow matters:
- you climb more carefully near rising ground
- you spend time rechecking obstacle spacing
- you may need to reposition for signal or line-of-sight
- headwind on the way back turns a comfortable margin into a thin one fast
My field habit is simple. I keep one battery mentally reserved for indecision. Not literally unused, but operationally protected. If a route looks beautiful but pushes me into the part of the flight where every shot competes with the trip home, I skip it. The best battery management move is often refusing the extra clip.
Another practical point: after landing, do not swap immediately and relaunch just because the light is still good. Pause. Feel the wind again. Reassess the terrain. Review whether the first flight revealed hidden hazards near the tree line or upper slope. Fresh battery, old assumptions is how pilots repeat the same mistake with more confidence.
Obstacle avoidance is useful, but only if you respect its blind spots
For field work, obstacle avoidance on the Mini 5 Pro is most helpful in three situations:
- backing away from a subject while terrain detail fills your attention
- transitioning around tree-lined field edges
- smoothing risk during slow, low-altitude framing adjustments
But “obstacle” is not a uniform category in rural environments. Dense branches read differently than wires. Isolated posts behave differently than a hedgerow. Strong side light can also change how visible certain hazards feel to the pilot even before the drone interprets the scene.
What this means in the field is that obstacle avoidance should shape your safety margin, not shrink it. If the drone has systems that help you detect and respond, that is a reason to fly more intelligently, not more tightly.
A good rule is to choose one variable to compress, not all of them. If you want low altitude, keep speed low and route simple. If you want a dynamic reveal near obstacles, stay higher. Complex terrain punishes stacked ambition.
When to use ActiveTrack in agriculture-style scenes
ActiveTrack is often discussed as if it were mainly for sports or moving people. In field capture, it has a narrower but still valuable role.
It works well when:
- a vehicle or person follows a defined farm track
- the background remains visually separate from the subject
- you want repeated passes with matching composition
- you need hands-on attention for altitude and route monitoring rather than constant yaw and framing
It works poorly when:
- the subject disappears against rows or shadows
- the path moves near overhead branches or poles
- the terrain causes abrupt vertical relation changes
- the subject direction changes suddenly around embankments or breaks
The operational significance is simple. ActiveTrack can reduce pilot workload, but in complex fields the real burden is not always subject framing. It is terrain interpretation. Use the feature where it removes repetitive control input, not where it distracts you from the land itself.
If you regularly capture working farms, inspection routes, or land stewardship footage, I usually suggest building a repeatable test route and refining it over several sessions. If you want to compare approaches for your own location, send a note through this field capture contact link and describe the terrain challenges you are dealing with.
QuickShots and Hyperlapse: useful, but only with intent
QuickShots and Hyperlapse are easy to misuse in field work because they can produce movement that looks polished without actually communicating anything.
Use QuickShots when you need:
- an establishing move that clearly frames scale
- a repeatable shot to compare seasonal changes
- a clean intro or outro anchored by surrounding terrain
Use Hyperlapse when the field has visible movement patterns worth compressing in time:
- cloud shadows moving across contour lines
- changing light over terraces
- machinery movement that shows route logic
- fog lifting from lower sections at sunrise
Hyperlapse is especially strong in complex terrain because slope and layered depth give the time-compression effect real structure. Flat land can make time-lapse feel abstract. Uneven land makes it legible.
Still, be selective. A Hyperlapse that ignores the geometry of the field becomes decorative noise. The best sequences are positioned where the terrain itself creates a readable progression.
Camera settings that help when fields are visually messy
Fields in complex terrain are full of exposure traps. Bright sky. Dark hedges. Light soil. Shaded furrows. Reflective water. If you let the scene bully your settings, footage gets thin quickly.
A few practical habits help:
- shoot D-Log when the contrast is high and you expect to grade later
- protect highlights first if clouds and reflective surfaces dominate the scene
- avoid over-speeding shutter choices just to keep the image “crisp”
- slow your movement before raising ISO late in the day
- capture one neutral reference pass before experimenting with dramatic light angles
The reason I keep returning to D-Log is not aesthetics alone. In a complex field scene, latitude is a working advantage. You may only get one clean pass before wind changes, machinery enters frame, or the sun drops behind a ridge. Flexible footage is insurance.
A sample flight plan for one battery
If I had one battery to capture a difficult field, this is the order I would use:
- Launch from the best visibility point, not necessarily the closest one.
- Make a short altitude check to read wind and confirm obstacle spacing.
- Fly one orientation pass to understand the terrain on screen.
- Capture one contour reveal while light is stable.
- Do one low-structure pass along the most legible line in the field.
- Use ActiveTrack only if the subject route is clean and obvious.
- Finish with a summary shot or QuickShot while battery margin is still comfortable.
- Land before the final portion of battery becomes a negotiation.
That last point is the one that matters most. In difficult terrain, smooth operations come from ending the mission while you still have options.
The real advantage of the Mini 5 Pro here
The Mini 5 Pro is not interesting just because it can produce attractive aerial footage. It matters because its combination of portability, obstacle-aware support, intelligent tracking tools, automated shot modes, and flexible color capture can be turned into a disciplined field workflow.
That workflow is what separates nice-looking clips from reliable documentation.
When you are capturing fields in complex terrain, the drone should help you see structure: where the land rises, how access works, how rows align or break, where shadows hide detail, and how motion through the landscape actually feels. Obstacle avoidance supports safer positioning. ActiveTrack reduces repetitive control burden when the subject route is predictable. QuickShots help standardize certain reveals. Hyperlapse can expose how the field changes over time. D-Log gives you room when the terrain throws bright and dark extremes into the same frame.
None of that replaces judgment. It amplifies judgment.
If you fly the Mini 5 Pro this way, you stop chasing random cinematic moments and start building usable, repeatable aerial coverage of land that is harder than it looks from the road.
Ready for your own Mini 5 Pro? Contact our team for expert consultation.