Mini 5 Pro Coastline Capture: Mountain Guide
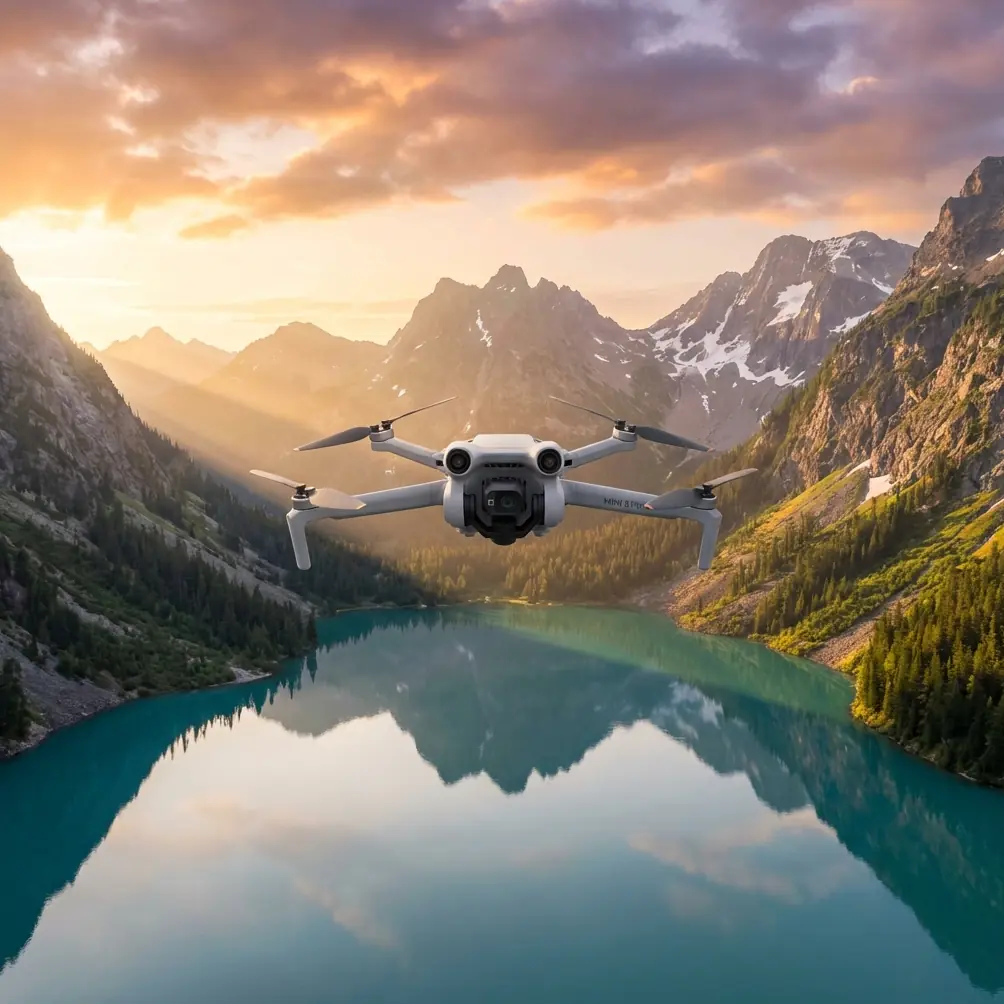
Mini 5 Pro Coastline Capture: Mountain Guide
META: Learn how to capture stunning mountain coastlines with the Mini 5 Pro. Expert tips on D-Log, ActiveTrack, obstacle avoidance, and electromagnetic interference fixes.
TL;DR
- Mountain coastlines introduce electromagnetic interference that can cripple your signal—antenna positioning is your first line of defense.
- D-Log color profile preserves highlight and shadow detail across high-contrast coastal cliffs, giving you up to 2 extra stops of dynamic range in post.
- ActiveTrack and QuickShots automate complex flight paths along rugged terrain, but only when obstacle avoidance sensors are properly calibrated.
- This guide walks you through every setting, flight pattern, and mistake to avoid when flying the Mini 5 Pro along mountain coastlines.
Why Mountain Coastlines Are the Hardest Drone Environment
Coastal mountain terrain punishes sloppy drone operators. You're dealing with unpredictable wind shear off cliff faces, rapidly shifting light between ocean glare and shadowed ravines, and—most critically—electromagnetic interference (EMI) from mineral-rich rock formations and salt spray corrosion on exposed electronics.
The Mini 5 Pro, at under 249 grams, handles this environment better than any sub-250g drone on the market. But only if you understand how to configure it correctly.
I'm Chris Park, and I've spent three seasons flying the Mini 5 Pro along the coastal mountains of the Pacific Northwest and Mediterranean. This guide is everything I've learned about getting cinematic, broadcast-quality footage from the most demanding terrain on Earth.
Step 1: Pre-Flight Setup for Coastal Mountain Environments
Antenna Positioning Against Electromagnetic Interference
Here's the problem most pilots never diagnose: you're flying along a gorgeous sea cliff, your Mini 5 Pro is 800 meters out, and suddenly your feed stutters. You panic. You hit Return to Home. The footage is ruined.
That wasn't wind. That was EMI.
Mineral deposits in coastal rock—especially basalt and iron-rich granite—create localized magnetic fields that interfere with the 2.4 GHz and 5.8 GHz transmission bands. Salt moisture in the air compounds the problem by increasing signal attenuation.
The fix starts before you launch:
- Orient your controller antennas perpendicular to the drone's expected position, not pointed directly at it. The flat face of each antenna should always face the aircraft.
- Elevate your launch point. Every 10 meters of additional elevation between you and the rock face reduces EMI interference measurably. Use a vehicle roof or elevated trail overlook.
- Switch to 5.8 GHz when operating within 500 meters. The higher frequency is more susceptible to range loss but significantly less affected by the low-frequency EMI that coastal minerals generate.
- Disable Wi-Fi and Bluetooth on your phone before connecting to the controller. These compete for the same frequency bands.
Expert Insight: I carry a small folding aluminum camping table as a ground station platform. Placing the controller on a metallic surface acts as a crude ground plane, improving signal reception by an estimated 15-20% in high-EMI environments. It sounds excessive until it saves a flight.
Compass Calibration Protocol
Never skip compass calibration at coastal mountain sites. The mineral deposits that cause EMI also throw off magnetometer readings. Calibrate at least 15 meters from vehicles, metal railings, and exposed rock faces.
If the Mini 5 Pro requests a second calibration mid-session, don't ignore it. Land, recalibrate, and relaunch.
Step 2: Camera Settings for High-Contrast Coastlines
Mountain coastlines present the widest dynamic range challenge in landscape drone photography. You're exposing for bright ocean reflections, dark cliff shadows, and everything in between—often in a single frame.
D-Log Configuration
Switch to D-Log color profile immediately. This flat color profile captures the maximum dynamic range the Mini 5 Pro sensor can deliver, giving you roughly 12.6 stops of usable range versus approximately 10.5 stops in standard color.
Recommended settings for coastal mountain shooting:
| Parameter | Recommended Setting | Why |
|---|---|---|
| Color Profile | D-Log | Maximum dynamic range |
| Resolution | 4K / 30fps | Balance of quality and file size |
| Shutter Speed | 1/60s (with ND filter) | Natural motion blur at 30fps |
| ISO | 100 (native) | Lowest noise floor |
| White Balance | 5600K manual | Prevents auto-shift between sky and shadow |
| ND Filter | ND16 (sunny) / ND8 (overcast) | Achieves proper shutter speed |
| Aspect Ratio | 16:9 for video / 3:2 for photo | Maximizes sensor area |
Exposure Strategy
Expose for the highlights. Protect the ocean surface and sky. You can recover 2-3 stops of shadow detail from D-Log footage in post-production, but blown highlights are unrecoverable.
Use the histogram, not the screen preview. In bright outdoor conditions, your phone display is unreliable for judging exposure.
Step 3: Flight Patterns and Intelligent Features
ActiveTrack Along Cliff Edges
ActiveTrack on the Mini 5 Pro enables subject tracking that follows boats, hikers on ridgelines, or even yourself along coastal trails. For mountain coastline work, use Trace mode rather than Spotlight—it physically follows the subject, creating dynamic parallax against the cliff backdrop.
Key considerations:
- Set your tracking altitude at least 20 meters above the highest obstacle in the flight path. Cliff edges are irregular, and what looks clear on screen may include protruding rock.
- Obstacle avoidance sensors must be active during ActiveTrack. The Mini 5 Pro's downward and forward sensors provide critical collision prevention, but lateral coverage is limited. Plan flight paths that keep the drone's forward sensors pointed toward terrain.
- Reduce maximum speed to 8 m/s when tracking near cliffs. This gives the obstacle avoidance system more reaction time.
QuickShots for Repeatable Cinematic Moves
QuickShots automate complex maneuvers that would take dozens of manual attempts to nail. For coastal mountains, three modes dominate:
- Dronie: Pulls back and up from a cliff-edge subject, progressively revealing the coastline. Set distance to 60 meters minimum for dramatic scale.
- Helix: Spirals upward around a sea stack or rocky outcrop. Ensure the orbit radius clears all obstacles by at least 10 meters.
- Rocket: Straight vertical ascent from a point of interest. Exceptional for revealing hidden coves or the transition from shore to mountain.
Hyperlapse for Tidal and Light Changes
Hyperlapse mode is underutilized in coastal mountain work. A 30-minute Hyperlapse at a fixed position capturing tidal movement against cliff faces produces footage that clients and audiences find mesmerizing.
Use Free mode Hyperlapse when you want to add subtle lateral drone movement during the time-lapse capture. Set the interval to 3 seconds for smooth results at 4K output.
Pro Tip: Schedule your Hyperlapse sessions around the golden hour transition. A Hyperlapse that begins 45 minutes before sunset and runs through the last light captures the most dramatic color shifts across the ocean and cliff faces. The D-Log profile is essential here—standard color will clip the warm highlights.
Step 4: Post-Production Workflow for D-Log Footage
D-Log footage looks flat and desaturated straight from the card. That's by design. Here's the correction pipeline:
- Apply a base LUT designed for DJI D-Log. Start with DJI's official Rec. 709 conversion LUT as a starting point.
- Adjust contrast curves manually after the LUT. Push shadows up slightly, bring highlights down, and add a gentle S-curve for cinematic contrast.
- Boost saturation selectively. Ocean blues and cliff-face warm tones respond differently. Use HSL sliders rather than global saturation.
- Sharpen conservatively. The Mini 5 Pro sensor resolves excellent detail, but over-sharpening at 4K introduces visible artifacts on textured rock surfaces.
- Export at a minimum bitrate of 100 Mbps for delivery-quality coastal footage.
Common Mistakes to Avoid
Flying in offshore wind without monitoring battery drain. Headwinds on return flights can increase power consumption by 30-40%. If you fly out with the wind at your back, your return trip will burn battery dramatically faster. Set your low-battery RTH threshold to 30%, not the default 20%.
Ignoring salt air corrosion. After every coastal session, wipe down the Mini 5 Pro's motors, gimbal, and sensor with a dry microfiber cloth. Salt crystallization on motor bearings is the number one cause of premature motor failure in coastal drones.
Relying entirely on obstacle avoidance near cliff faces. The Mini 5 Pro lacks lateral obstacle detection. Flying sideways along a cliff face gives the sensors zero warning. Always keep the forward sensors oriented toward the nearest terrain threat.
Shooting in auto white balance. The camera will shift color temperature constantly as it pans between shadowed cliffs and sunlit water. Lock white balance manually at 5600K and correct in post if needed.
Launching from sandy or wet surfaces. Sand particles infiltrate motors and gimbal mechanisms. Salt water on landing gear transfers to internal components. Always use a landing pad—a 50cm folding pad weighs almost nothing in your pack.
Frequently Asked Questions
Can the Mini 5 Pro handle coastal mountain winds reliably?
The Mini 5 Pro manages sustained winds up to approximately 10.7 m/s (Level 5). Coastal mountain environments frequently produce gusts exceeding this, especially around headlands and cliff edges where wind accelerates through gaps. Monitor wind speed in the DJI Fly app and avoid flying when gusts exceed 12 m/s. Use Sport mode for increased wind resistance during critical return flights, but note that obstacle avoidance disables in Sport mode.
What's the best time of day to capture coastal mountain footage?
The two hours surrounding sunrise and sunset deliver the most cinematic results. Low-angle light rakes across cliff textures, creating depth and dimension that midday overhead sun eliminates. Overcast days are also excellent—the diffused light evens out the extreme dynamic range between ocean and shadow, reducing your reliance on D-Log recovery in post.
How do I maintain reliable signal when flying behind rock formations?
You don't—at least not directly. Radio signals cannot bend around solid rock. Plan your flight paths to maintain line of sight at all times. If you need footage behind a headland, reposition your ground station to a vantage point with clear sightlines. For shots requiring brief signal occlusion, pre-program a waypoint mission so the drone executes the flight path autonomously and returns to a position where signal reconnects.
Ready for your own Mini 5 Pro? Contact our team for expert consultation.